Skip to main content
4. LINE Login API
Channel
LINE除了開放強大的Messaging IDAPI功能, 還推出Login API功能, 讓開發商可以透過網頁技術開發很多商業應用服務, 可以取代 90%原生APP功能性, 也拉近與消費者體驗距離.
這個串接步驟流程有點多, 但要細心的看,
Channel1. Secret
分為100%、80%、60%網頁模式(LIFF ID Full ;網頁高度100%全版
2. LIFF ID Tall ;網頁高度80%
3. LIFF ID Compact)Compact 網頁高度50%
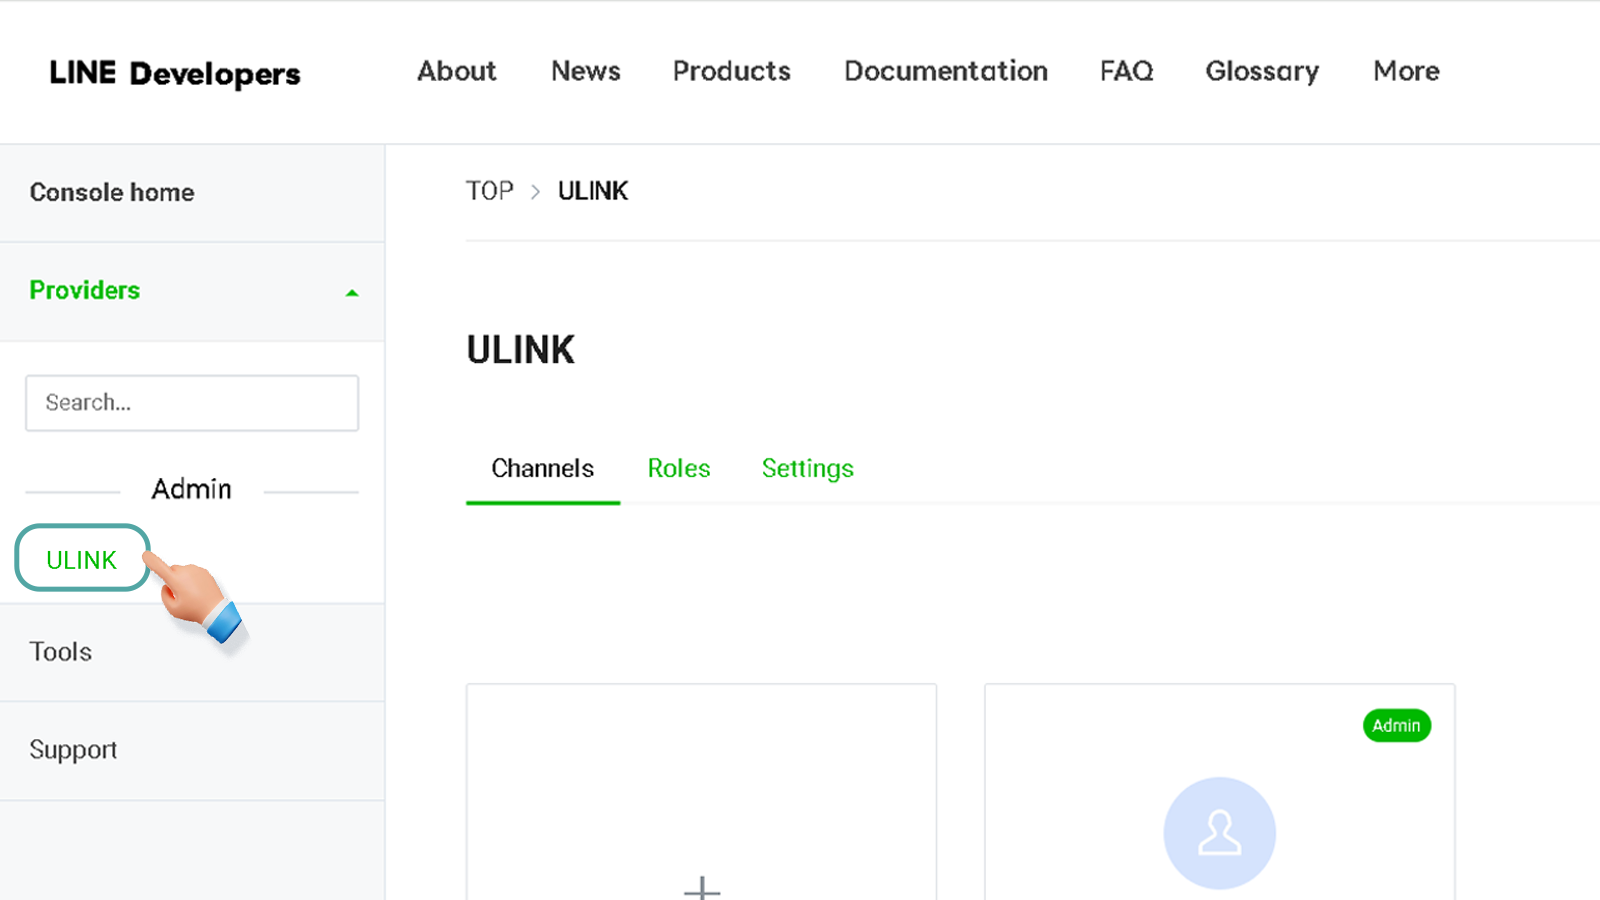
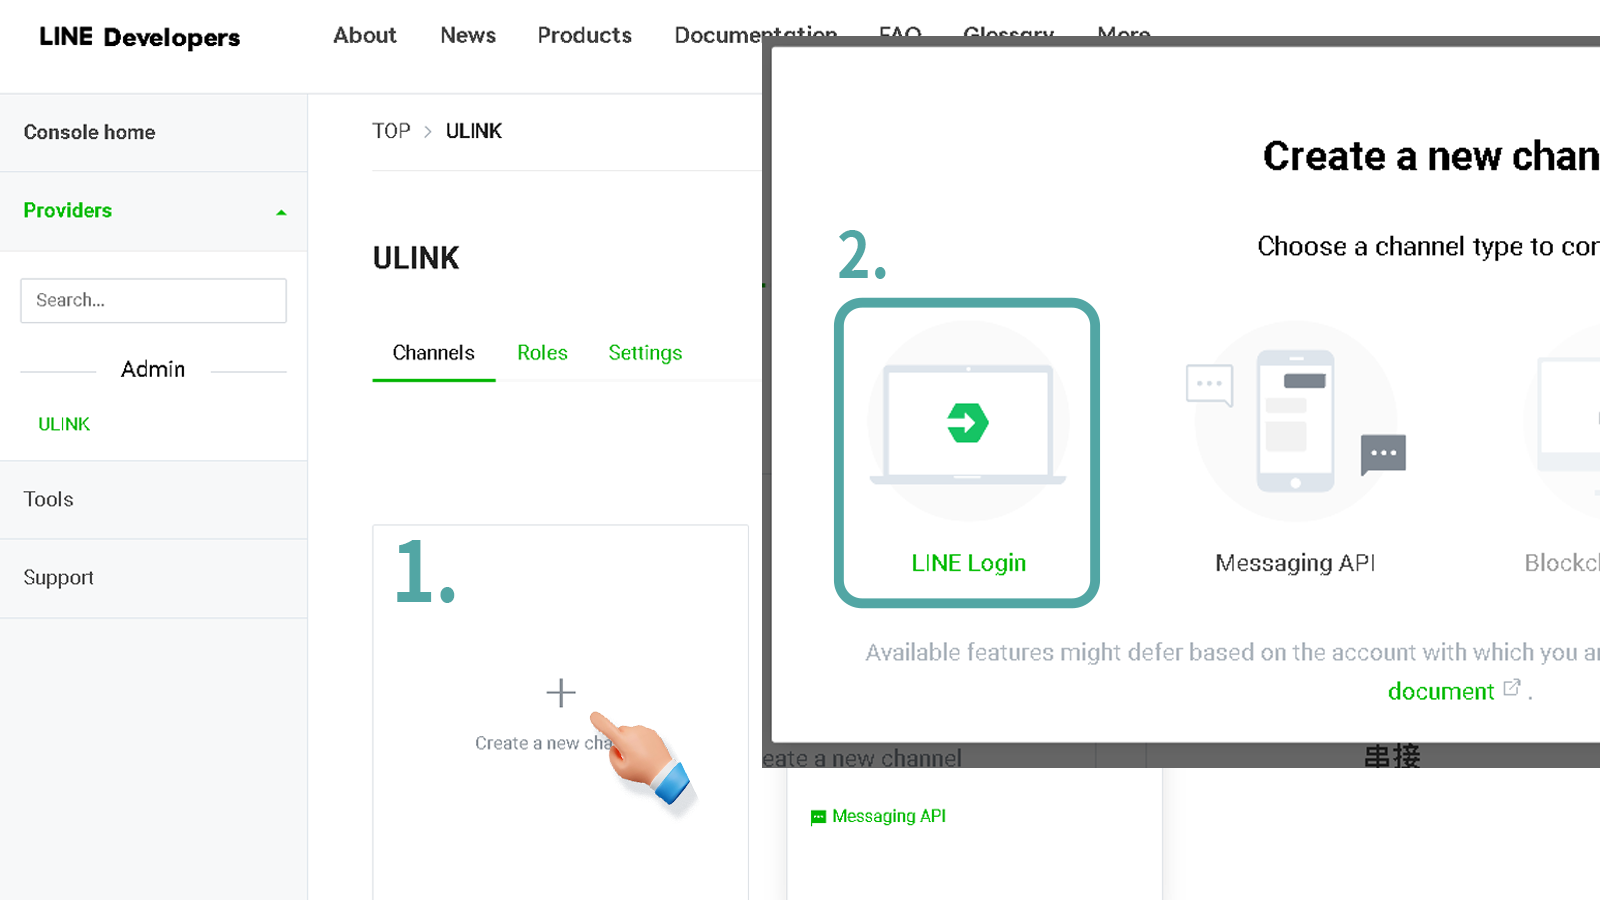
2. 點選「+Create a new channel」➔ 選擇「LINE Login」
3. 將「Region to provide the service」 、「Company or owner's country or region」設Taiwan 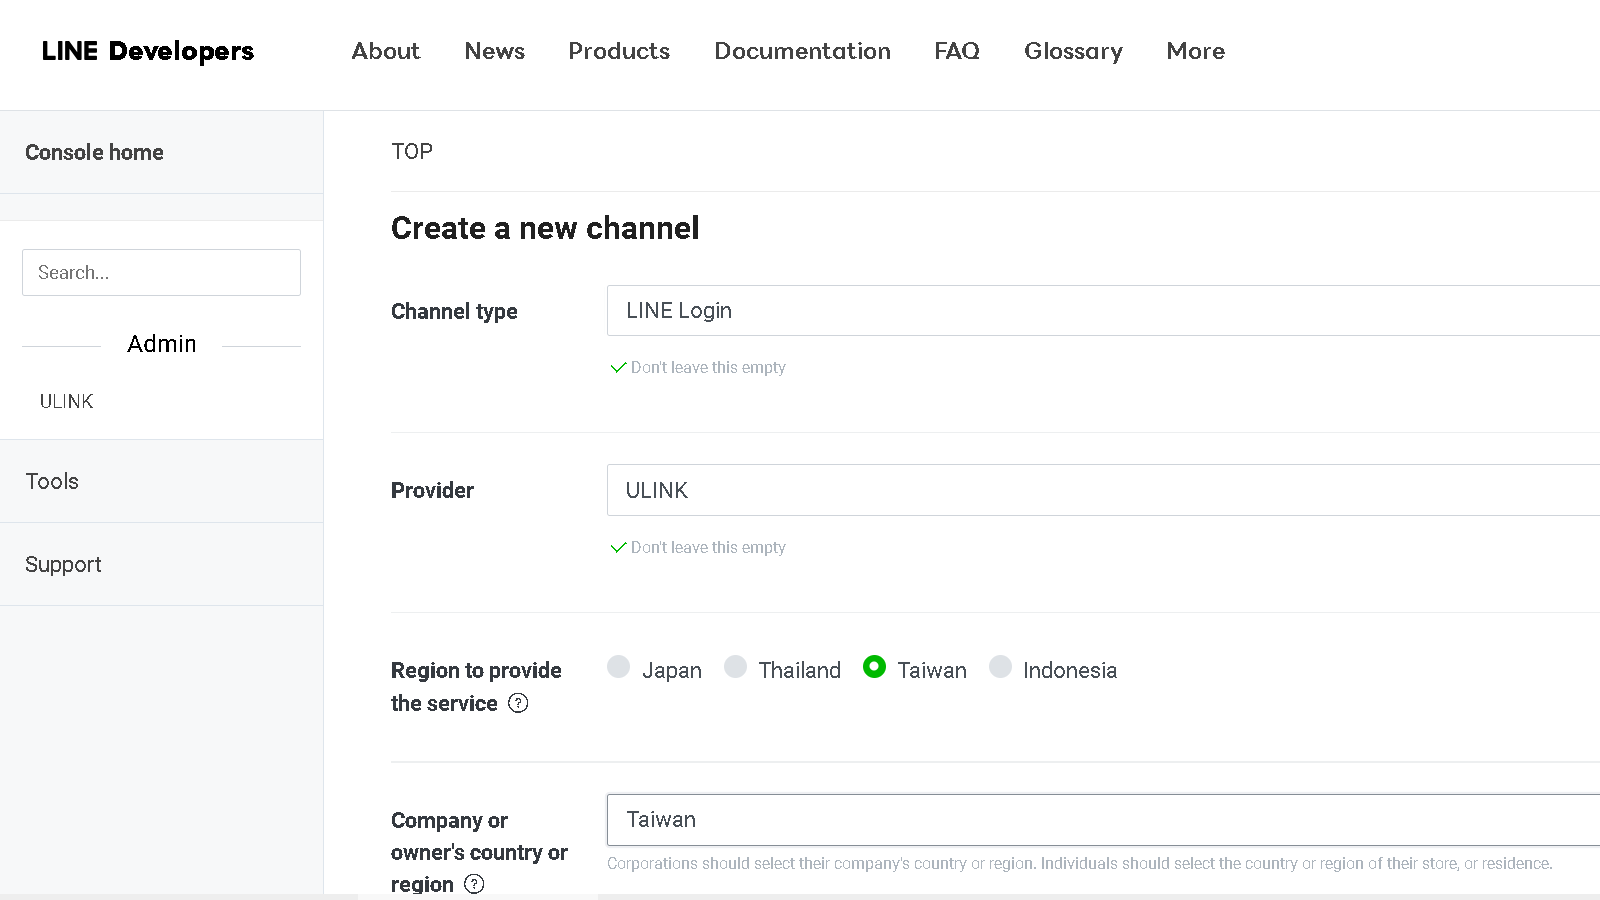
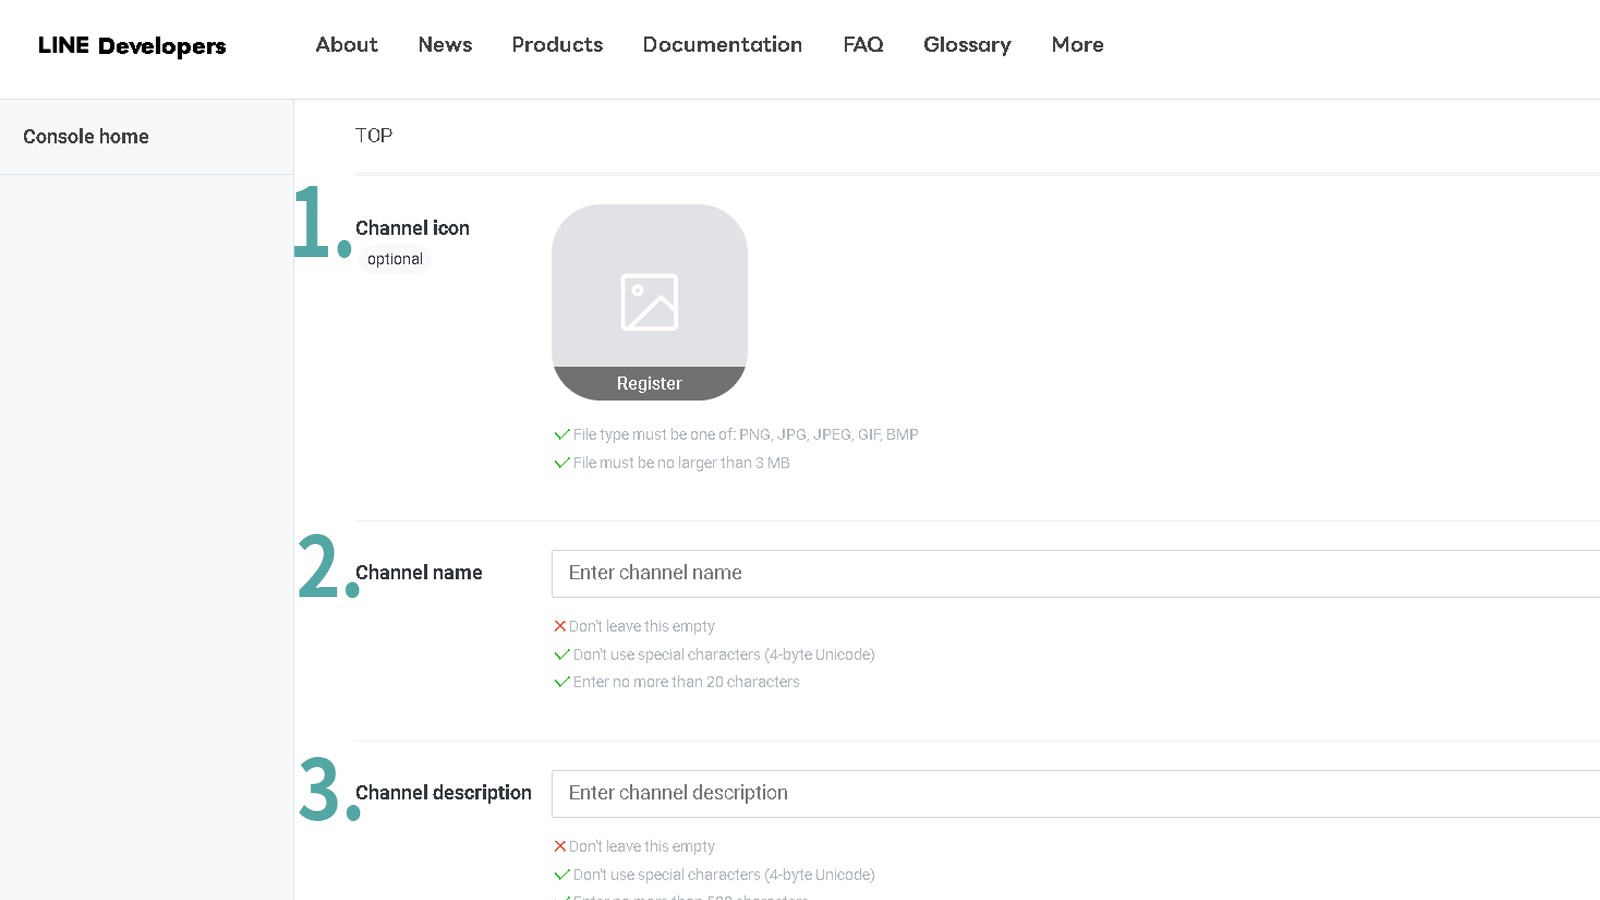
4. 選取LOGO圖 ➔ 輸入頻道名稱 ➔ 輸入頻道描述
5. 開啟App types ➔ 開啟Require two-factor authentication
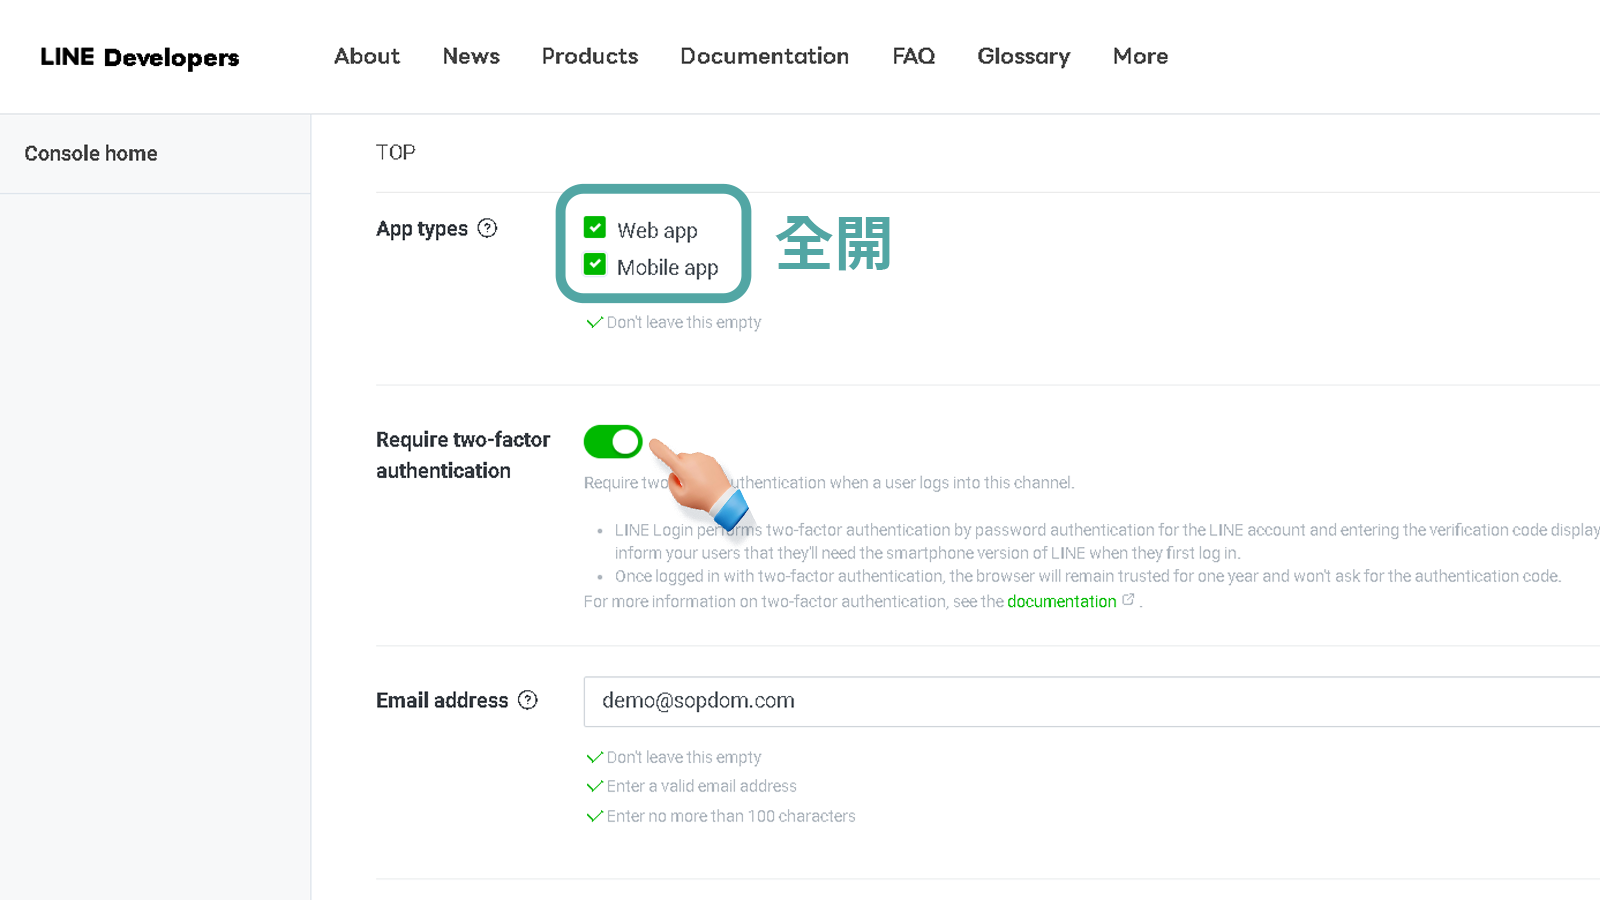
6. 勾選「I have read and agree to the LINE Developers Agreement」 ➔ 按 Create
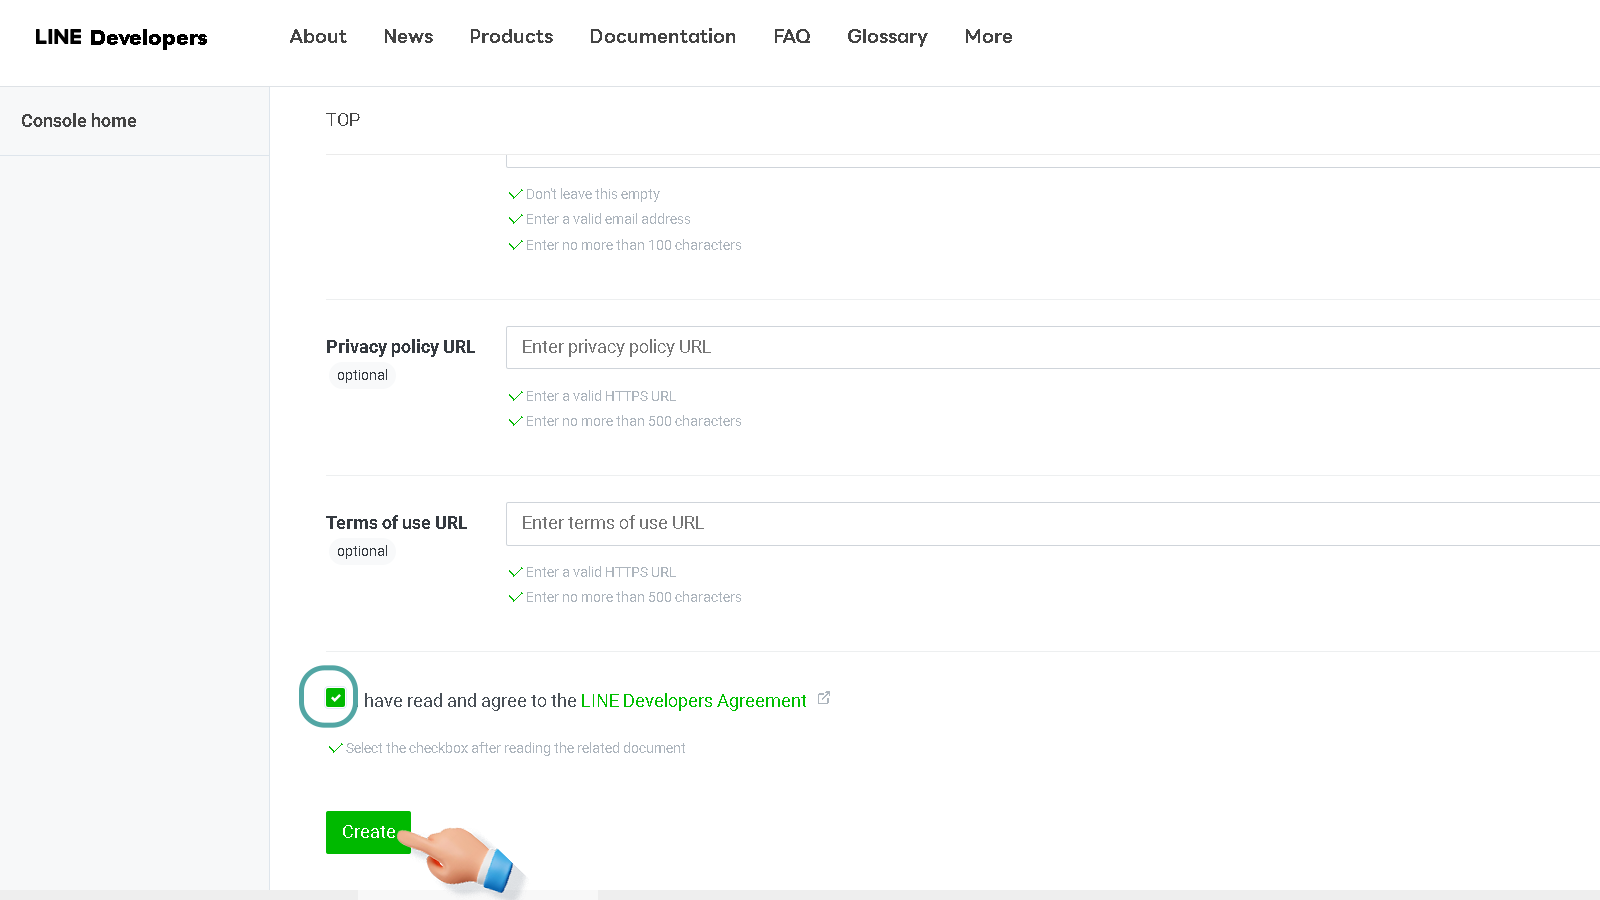
7. 點選「Developing」 ➔ 選「Publish」
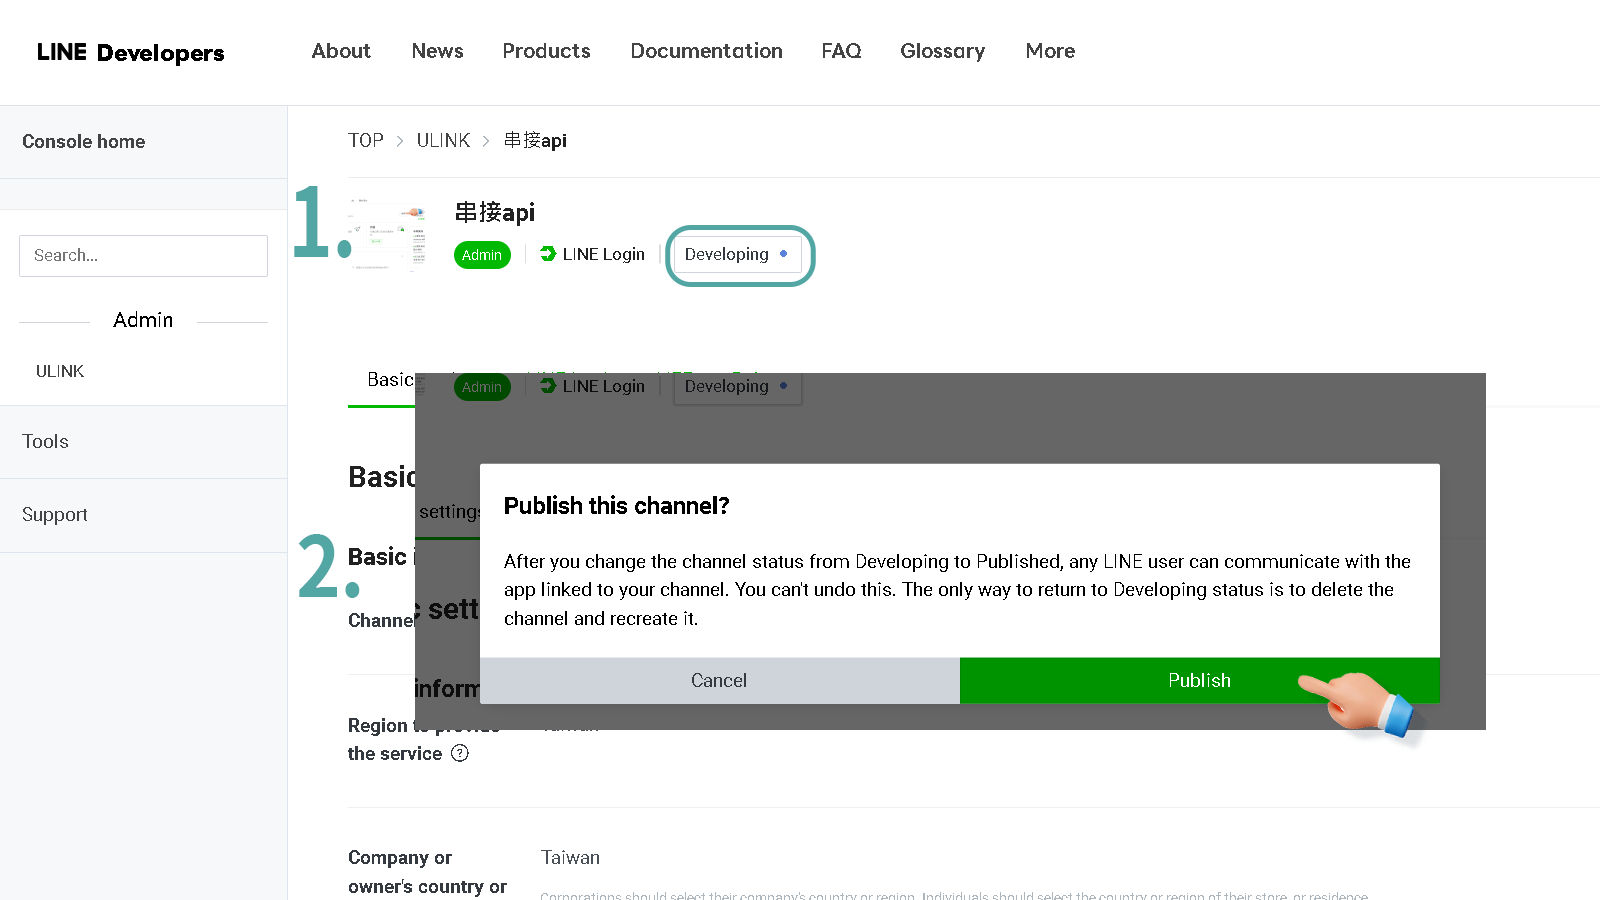
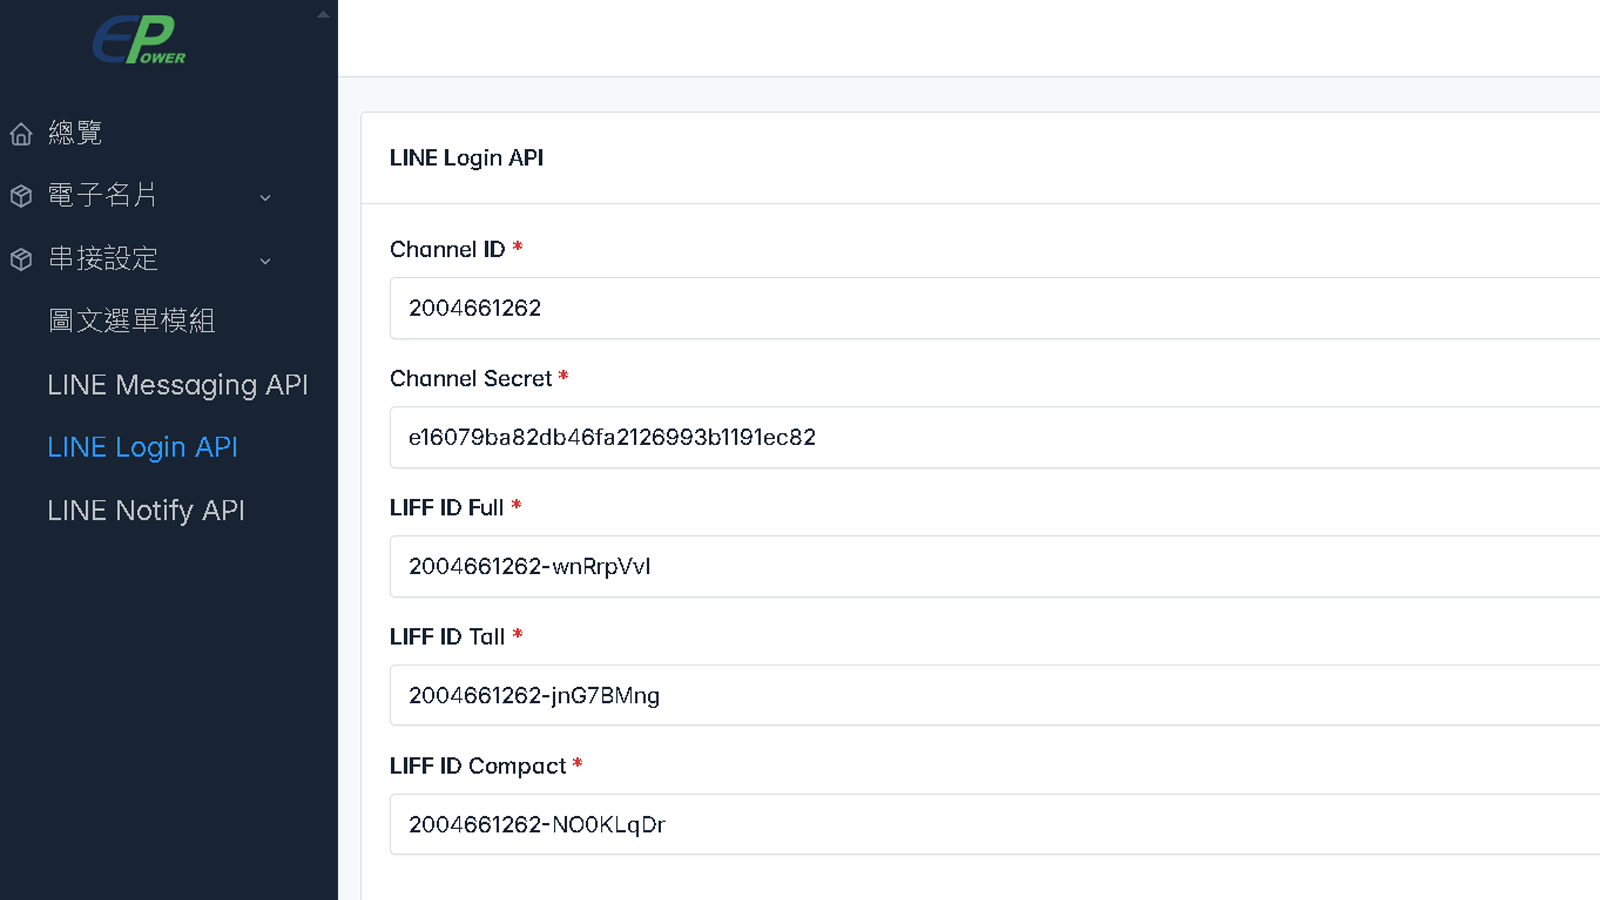
8. Channel ID 複製 ➔ 前往你的專屬後台 ➔ 串接設定 ➔ LINE Login API ➔ 貼上 Channel ID
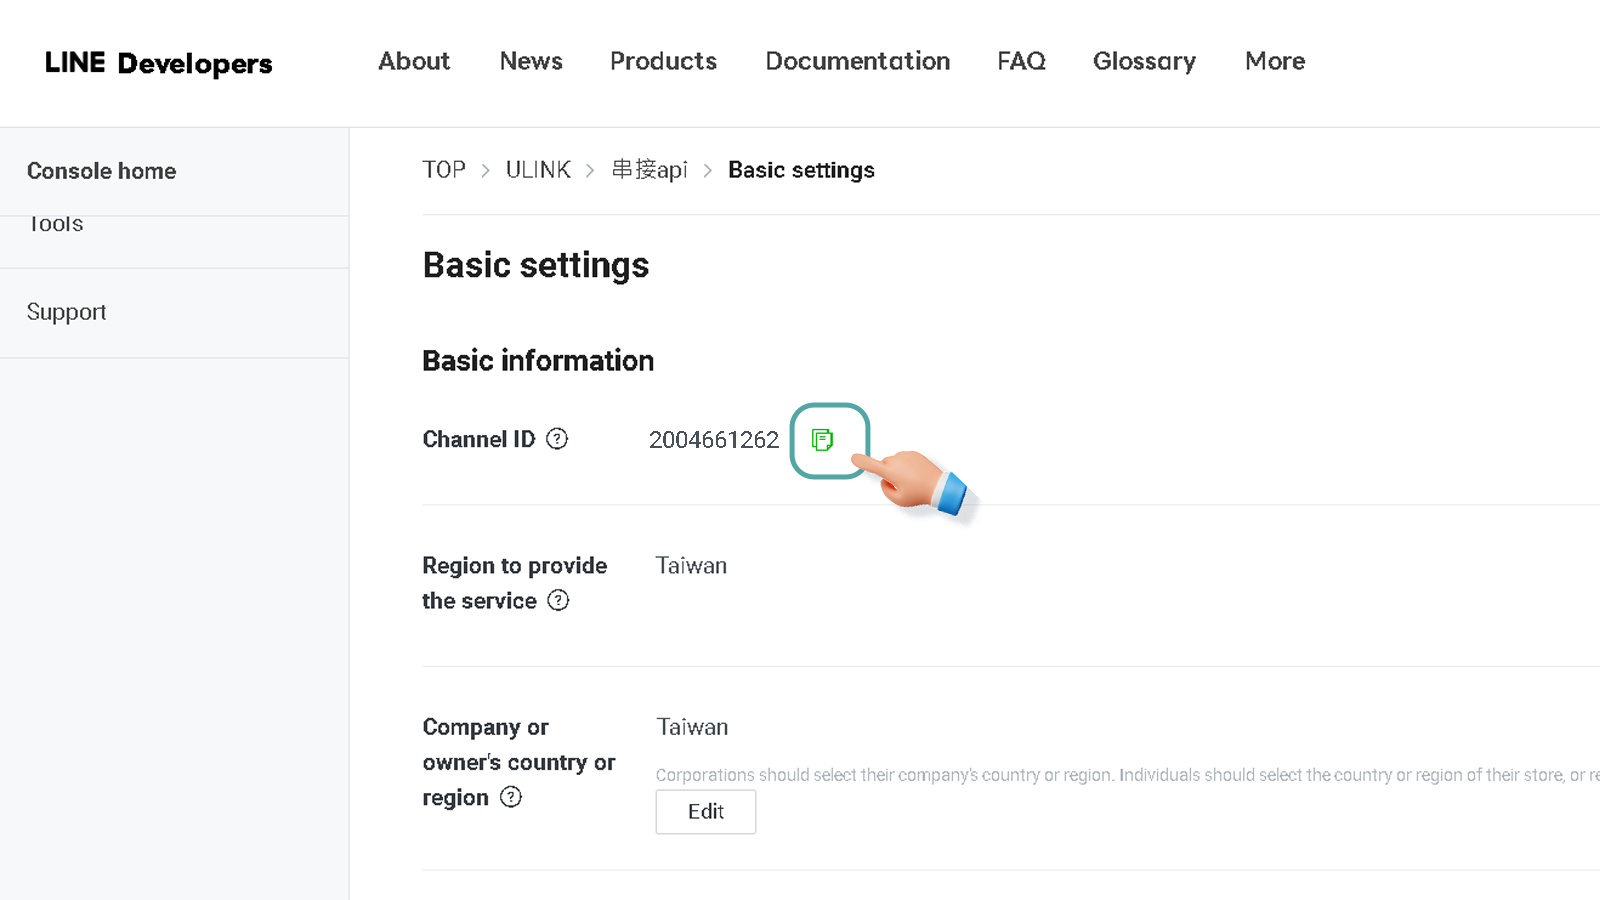
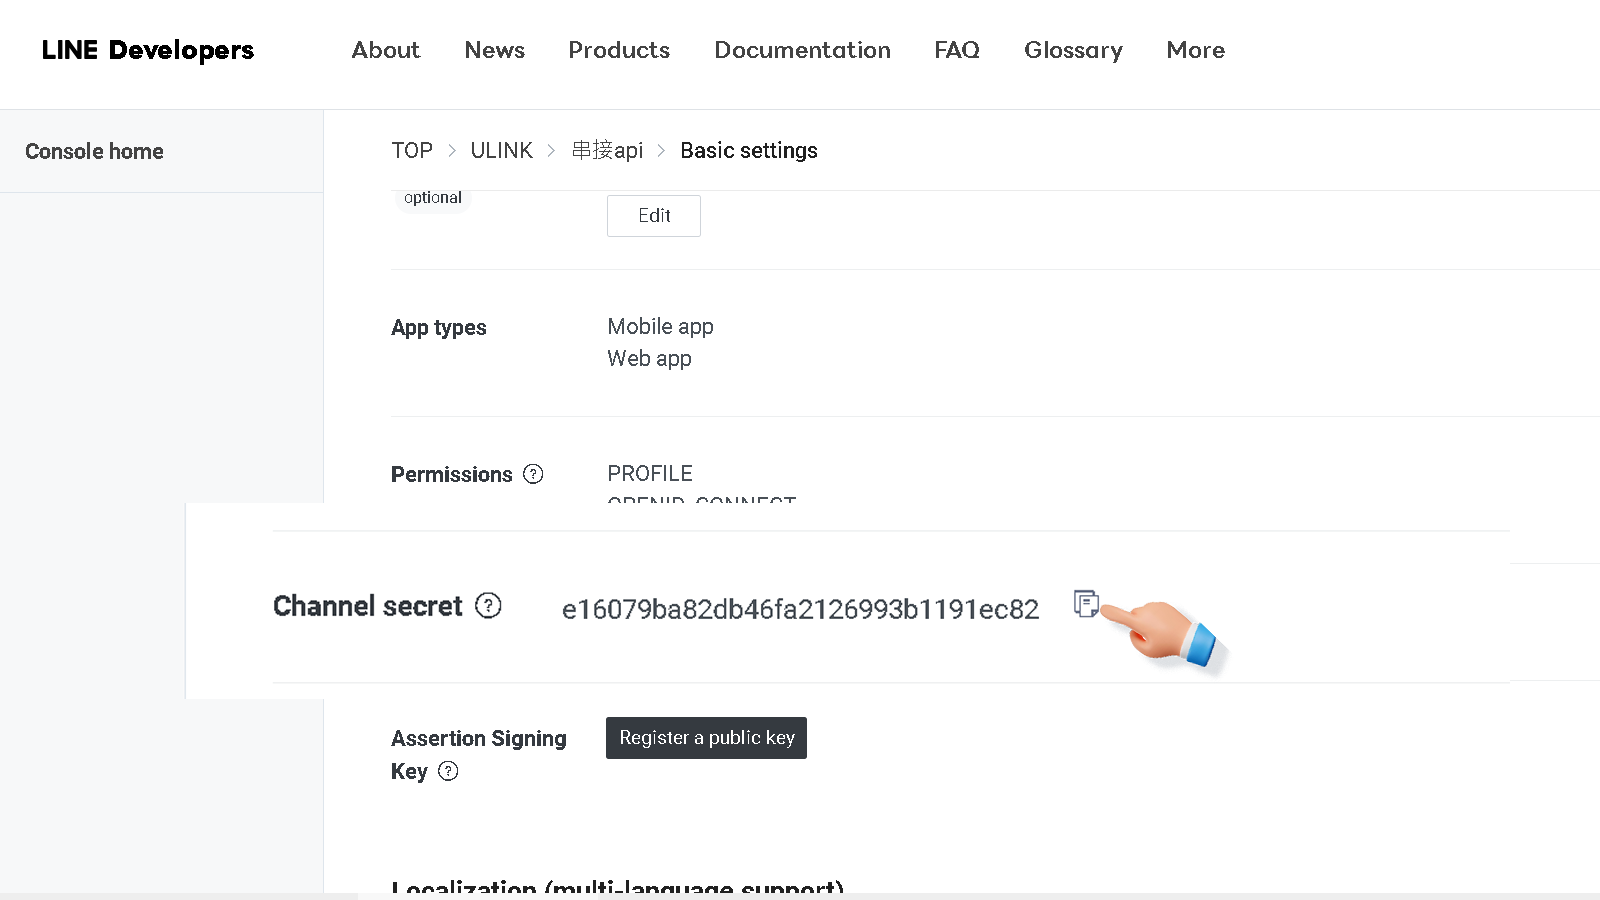
9. 複製 「Channel secret」➔ 前往你的專屬後台 ➔ 串接設定 ➔ LINE Login API
➔ 貼上 Channel Secret
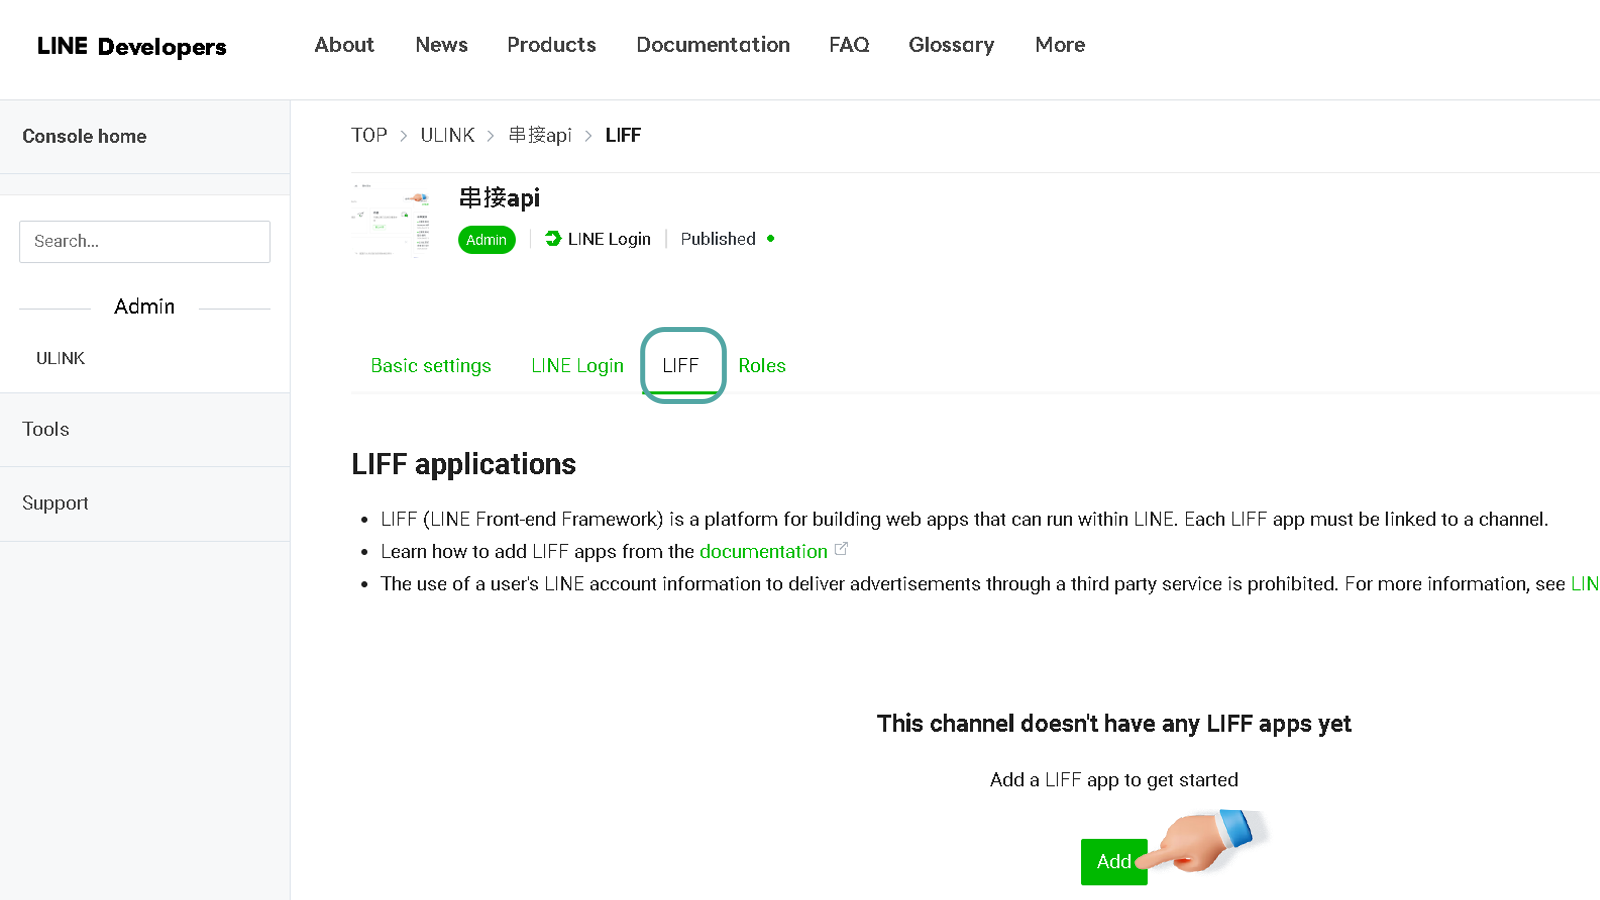
10. 點選LIFF ➔ 選擇 Add
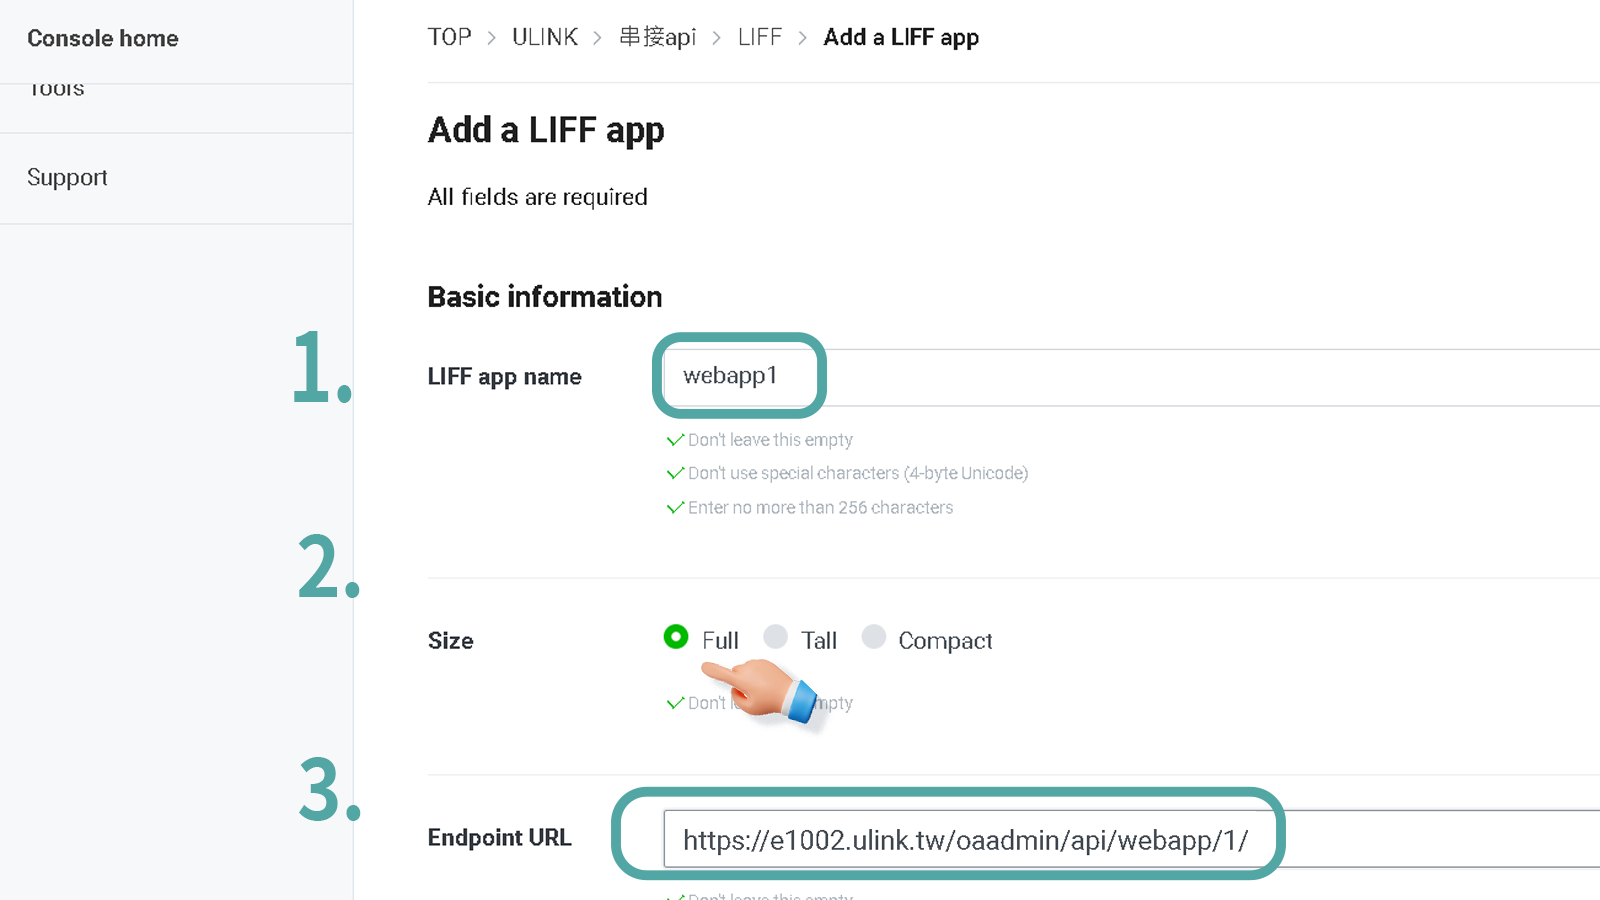
11. 在 LIFF app name ➔ 輸入webapp1
在 Size ➔ 點選Full
在 Endpoint URL ➔ 輸入網址
➔ 「https://更改為你專屬後台網址/oaadmin/api/webapp/1/」
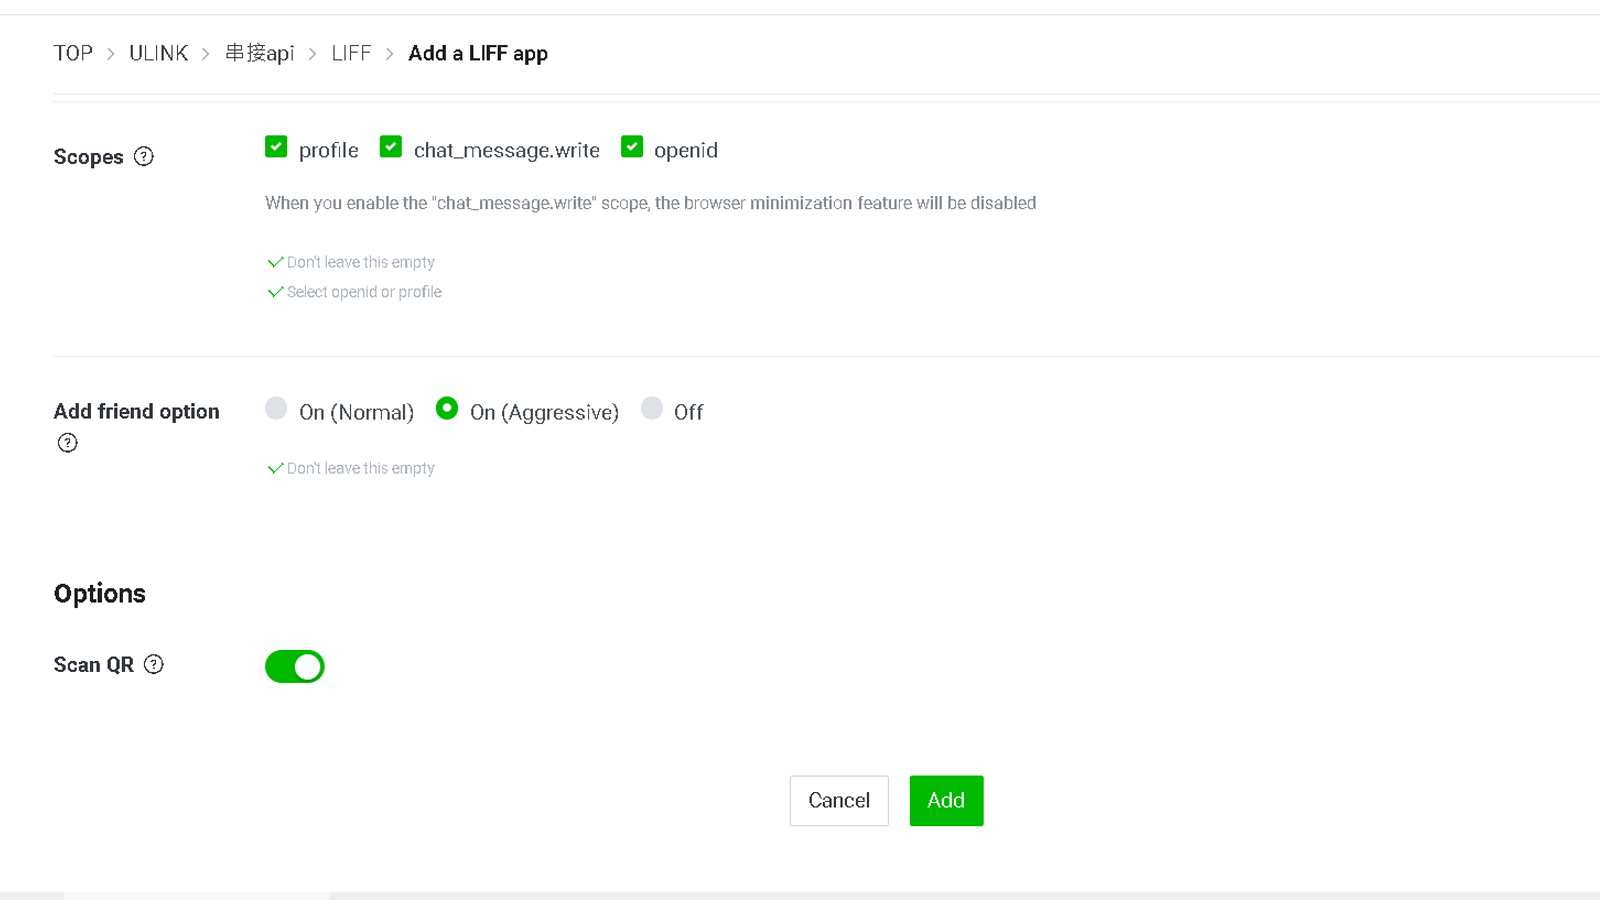
12. 勾選Scopes ➔ profile、chat_message.write、openid
➔ Add friend option ➔ On (aggressive)
➔ Options全開 ➔ Scan QR、Module mode
➔ 按 Add
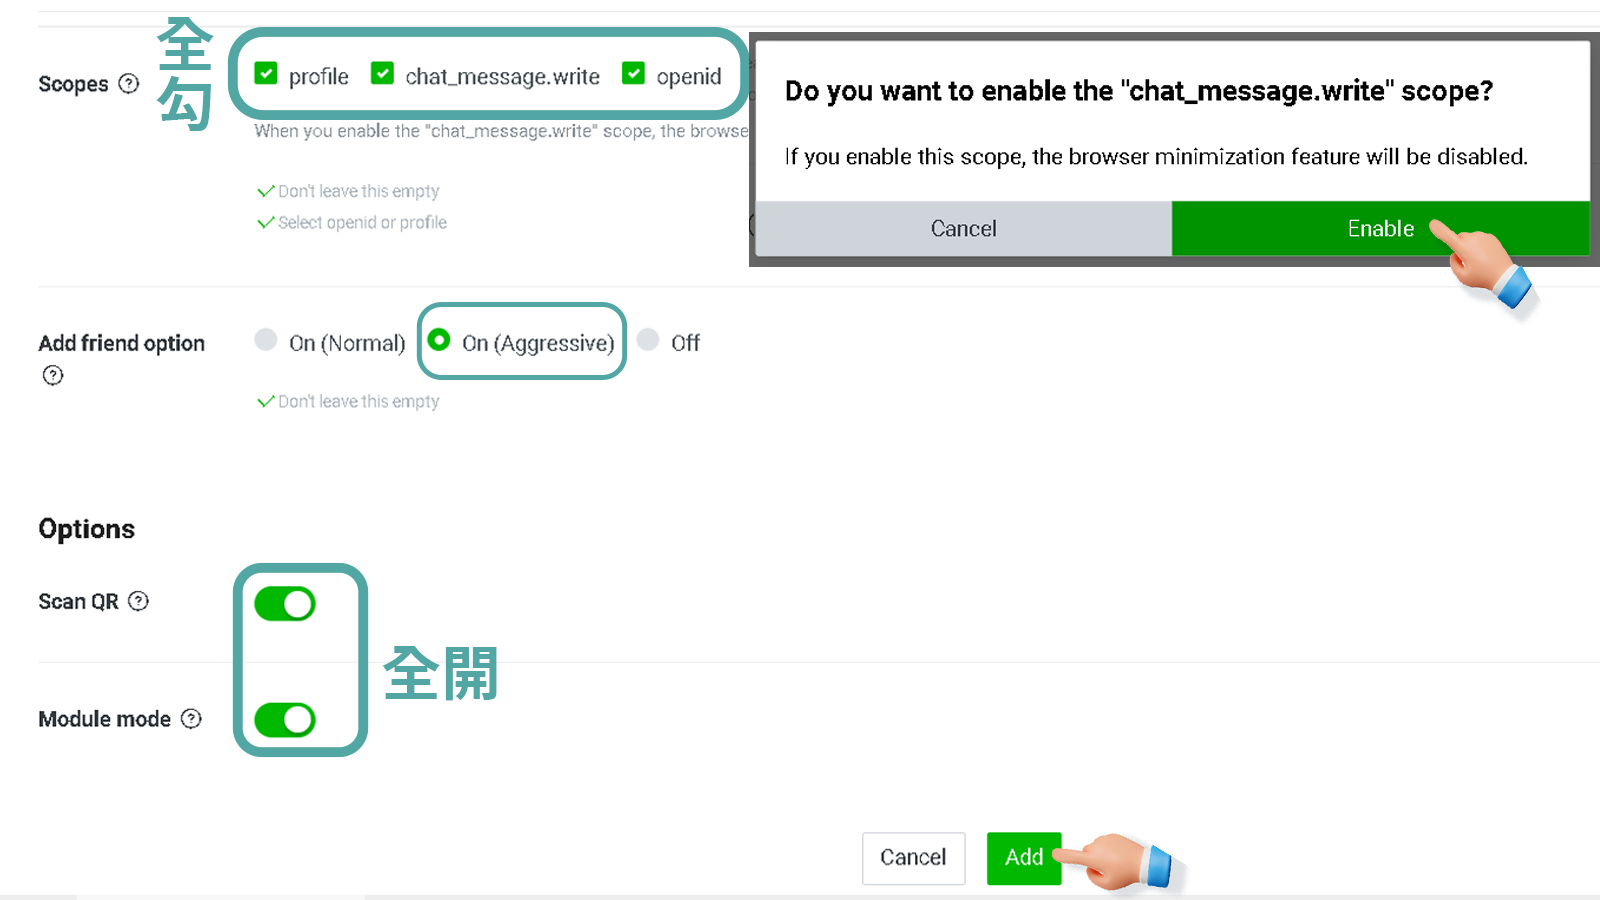
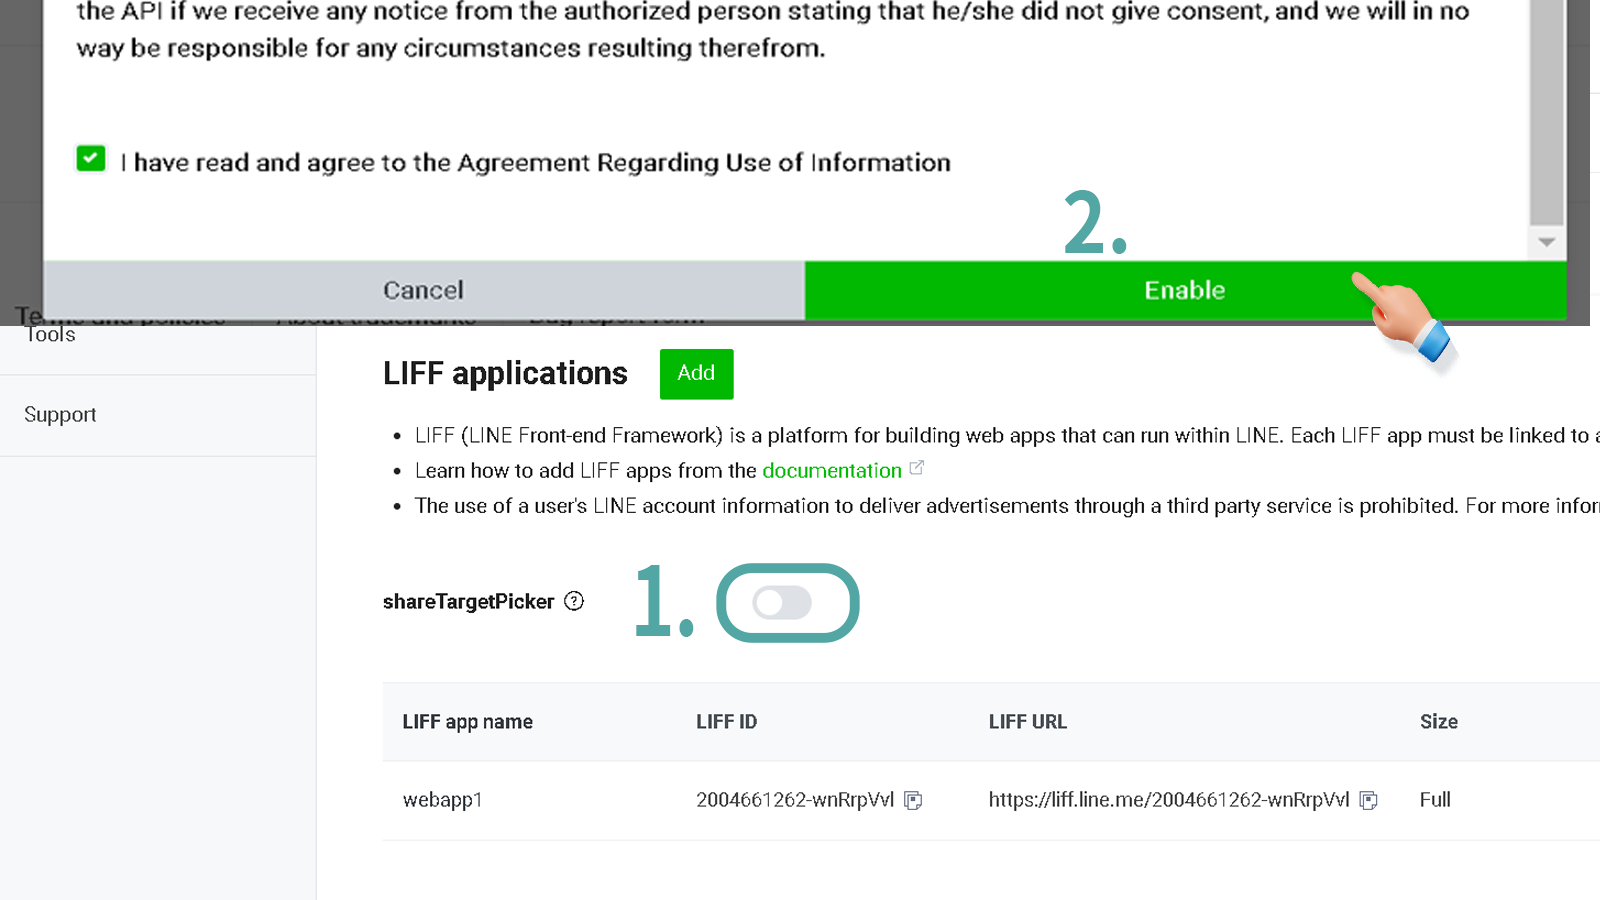
13.開啟shareTargetPicker ➔ 勾選I have read.... ➔ 按Enable
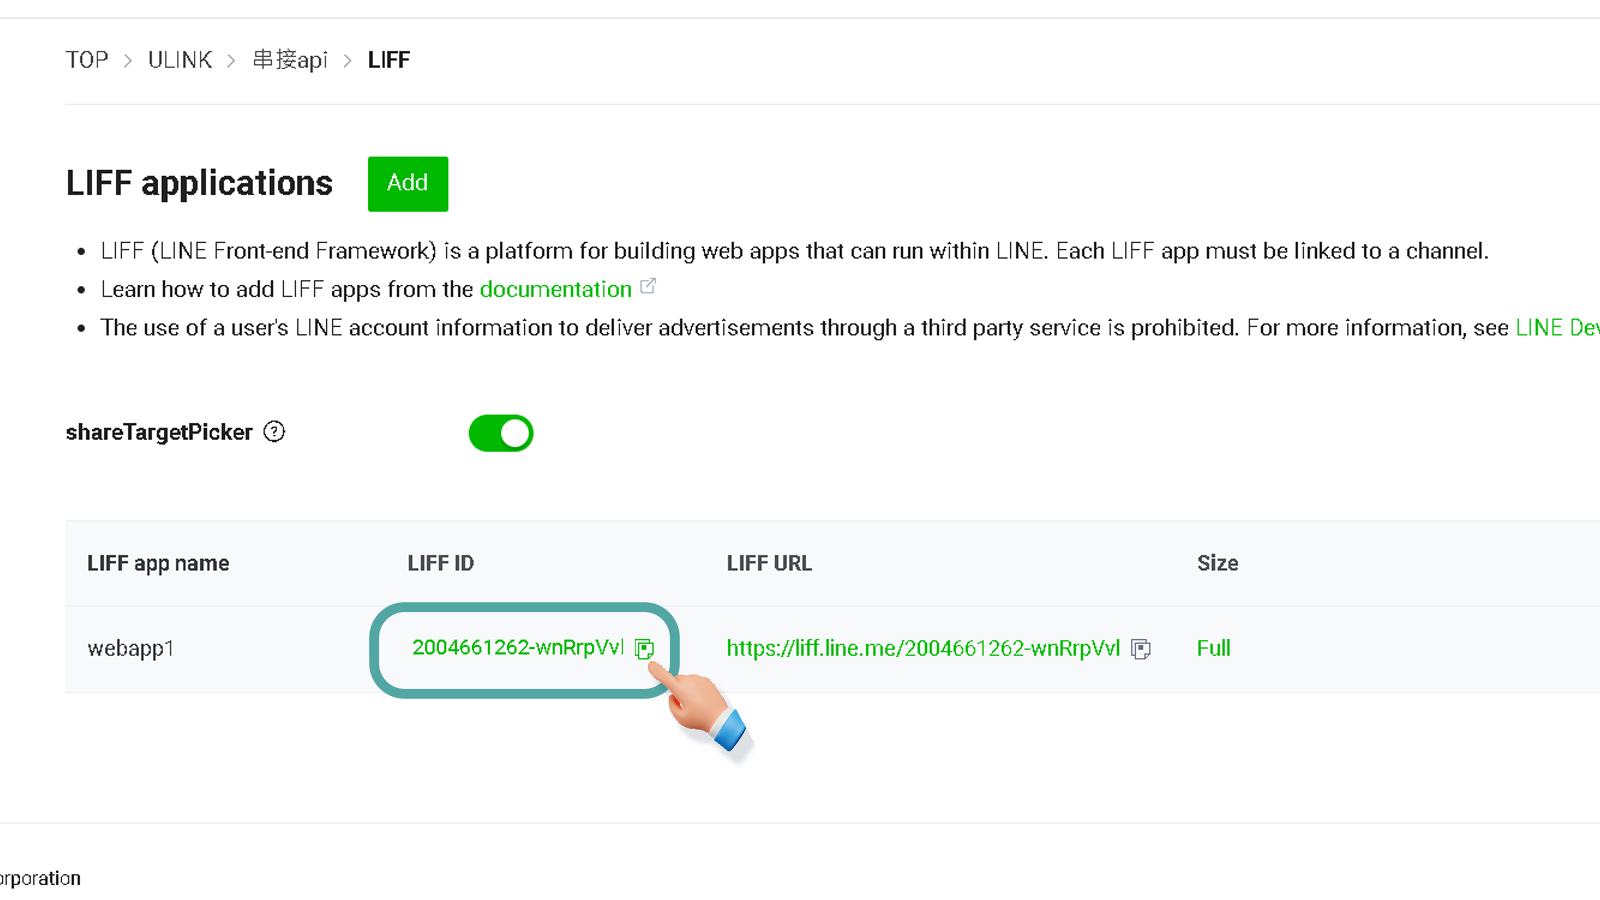
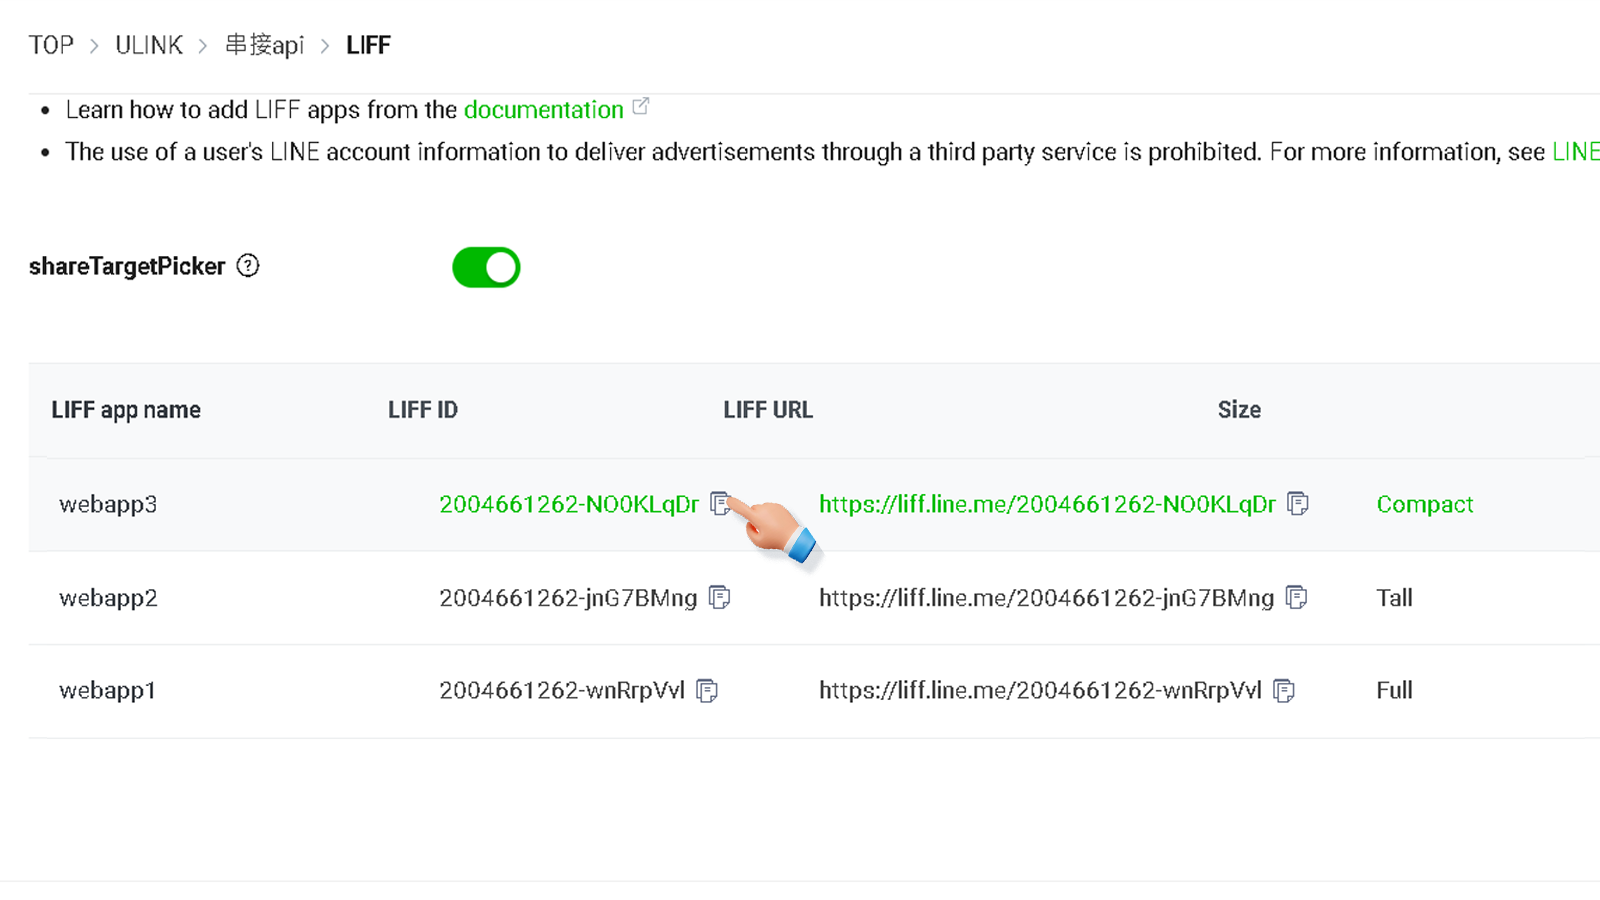
14.複製webapp1 ➔ LIFF ID
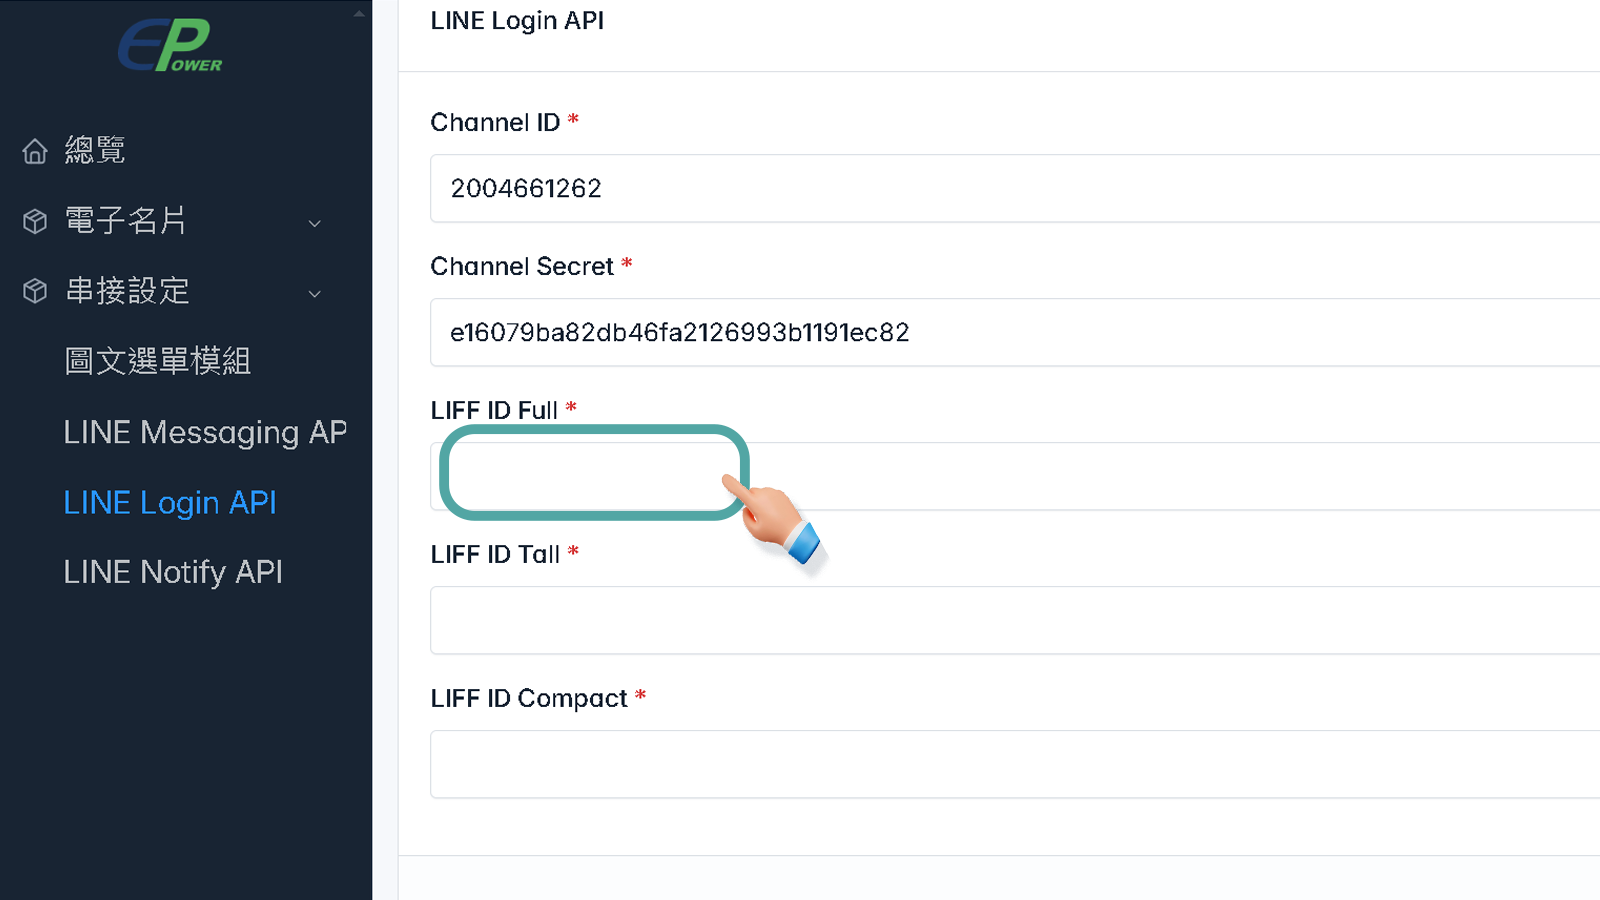
15.回到你的專屬後台貼上 ➔ 貼上 webapp1 LIFF ID
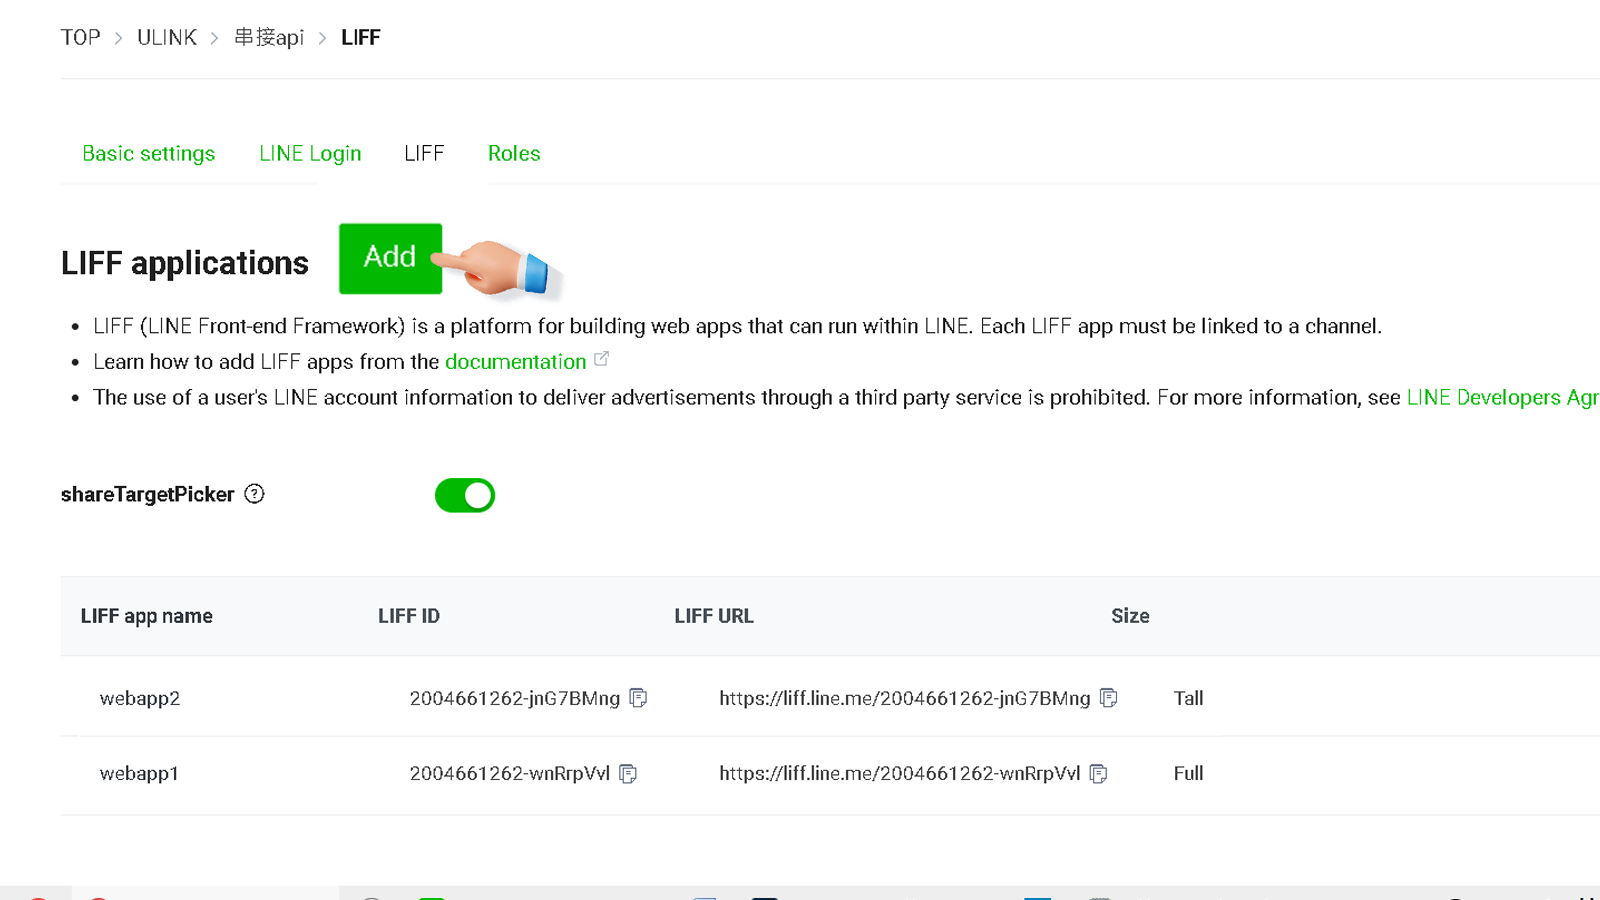
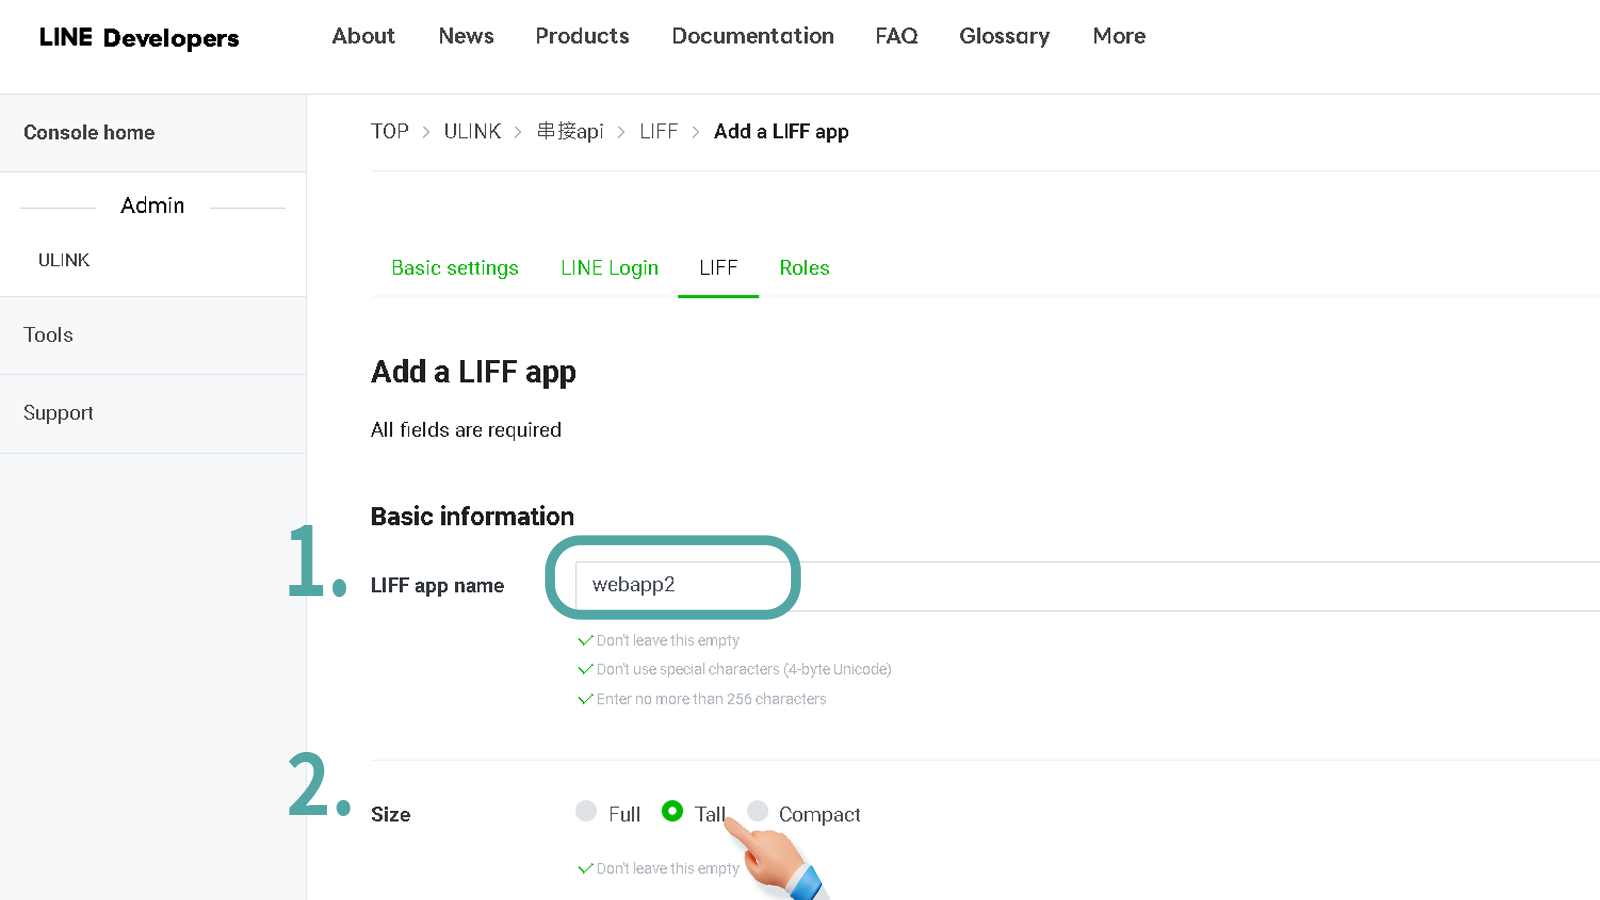
16. 回到 LINE Developers 按 ➔ Add ➔輸入LIFF app name「webapp2」➔ Size選「Tall」
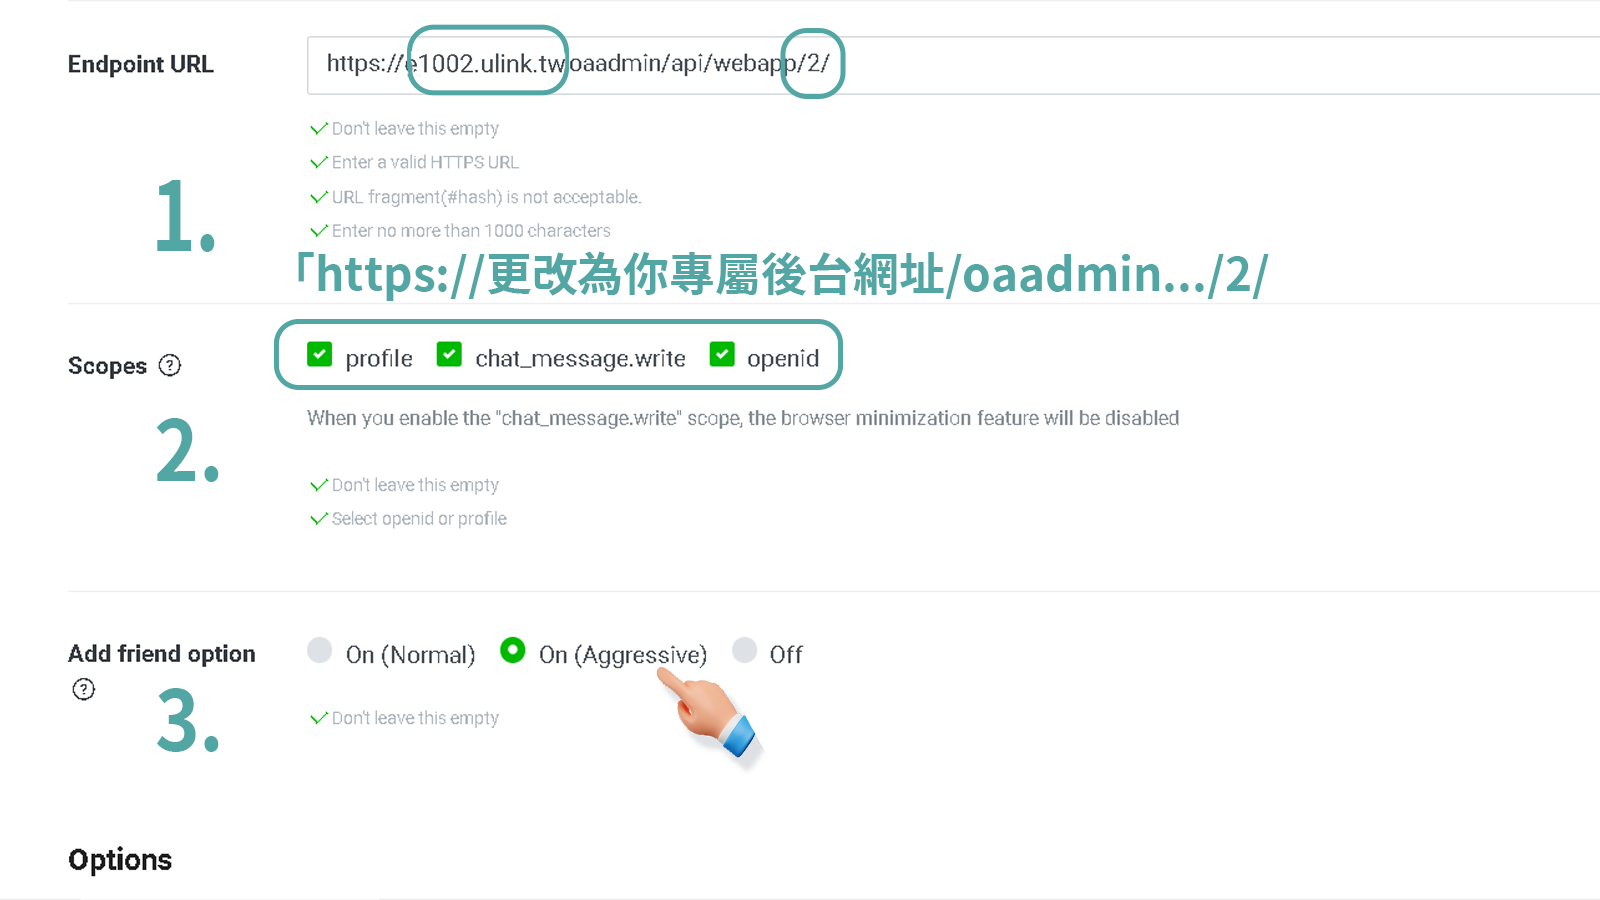
17. 在 Endpoint URL ➔ 輸入網址
➔ 「https://更改為你專屬後台網址/oaadmin/api/webapp/2/」
➔ 勾選Scopes ➔ profile、chat_message.write、openid
➔ Add friend option ➔ On (aggressive)
➔ Options開 ➔ Scan QR
➔ 按 Add
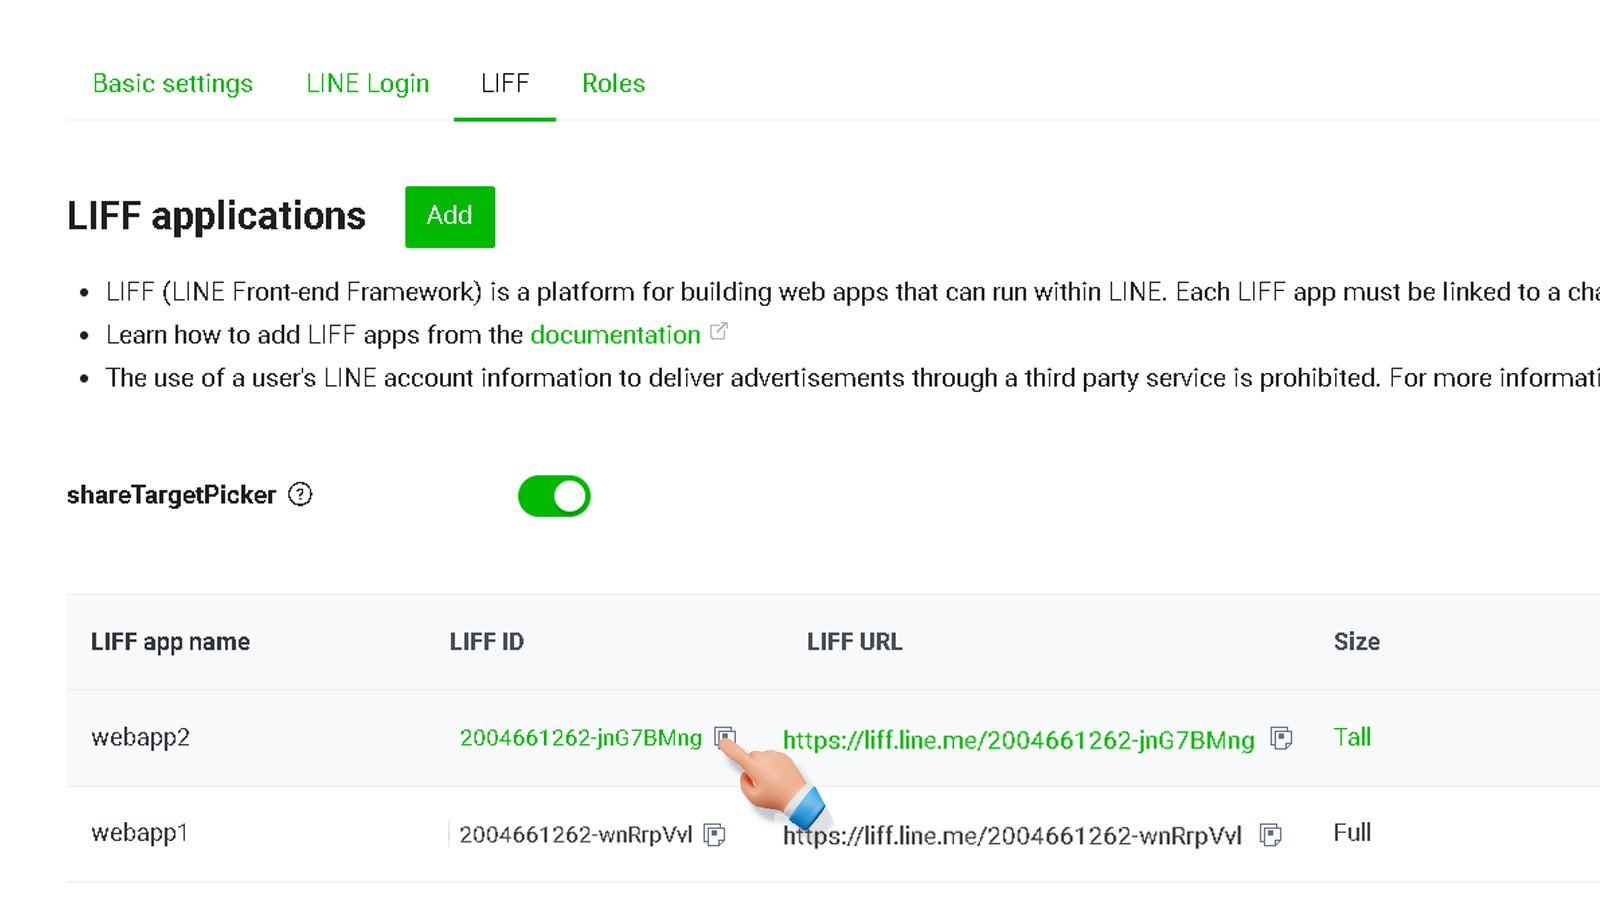
18. 複製webapp2 LIFF ID ➔前往你的專屬後台 ➔ 串接設定 ➔ LINE Login API
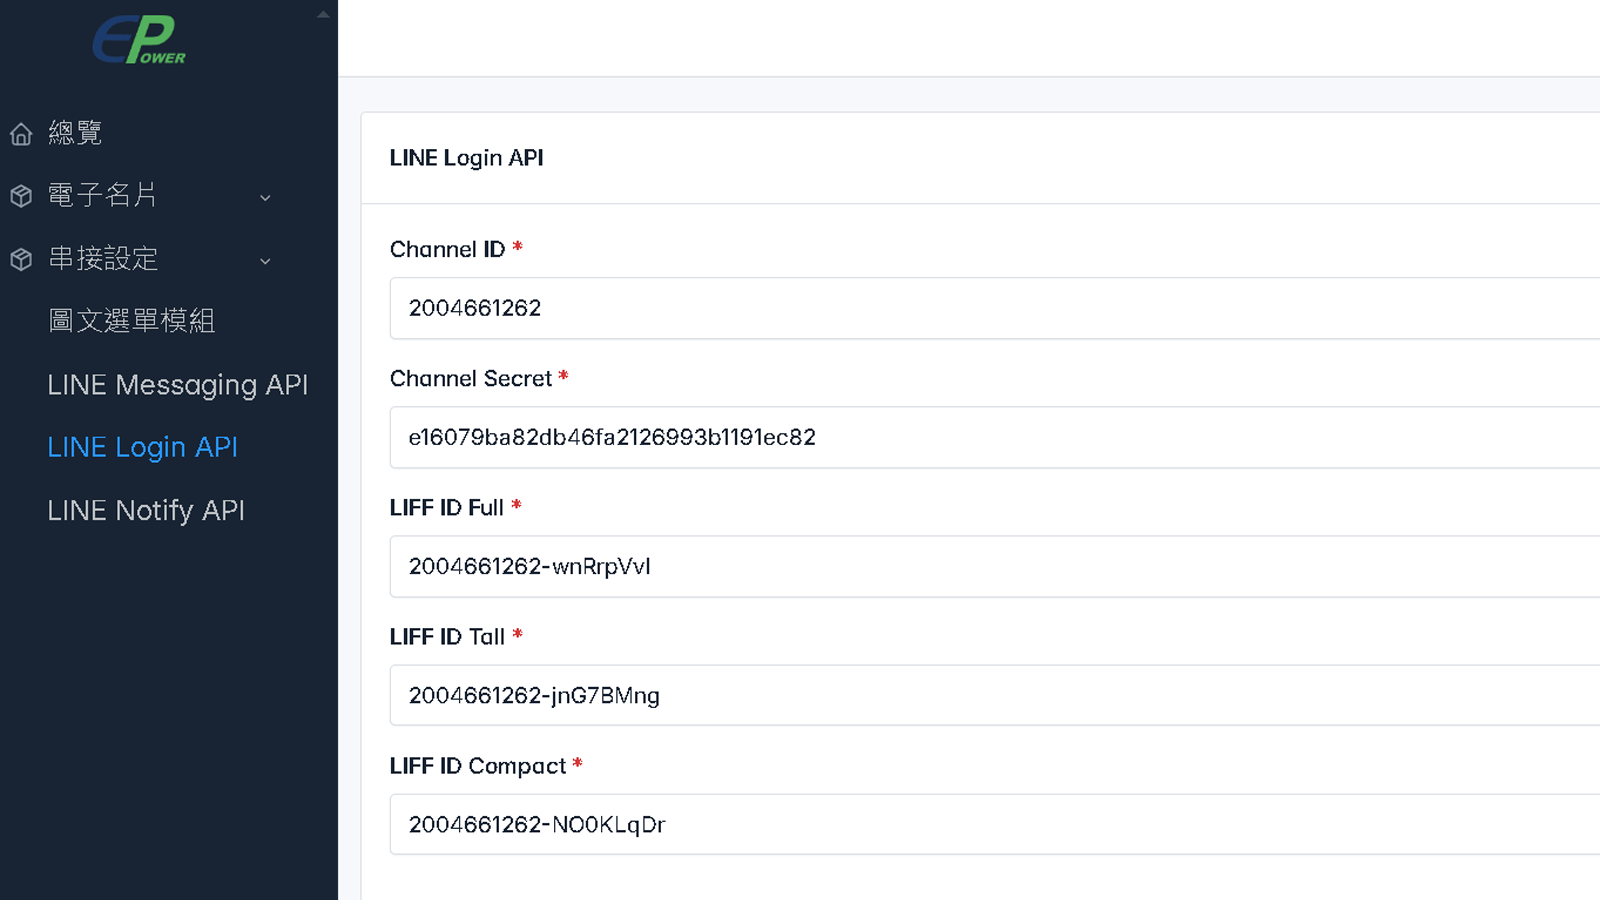
19.回到專屬後台 ➔ 貼上 LIFF ID Tall
20.回到 LINE Developers 按 ➔ Add

21. 輸入LIFF app name「webapp3」➔ Size選「Compact」 ➔ 輸入網址
➔ 「https://更改為你專屬後台網址/oaadmin/api/webapp/3/」
22.勾選Scopes ➔ profile、chat_message.write、openid
➔ Add friend option ➔ On (aggressive)
➔ Options開 ➔ Scan QR
➔ 按 Add
23.複製webapp3 LIFF ID
24.前往你的專屬後台 ➔ 串接設定 ➔ LINE Login API ➔ 貼上 ID Compact ➔ 按確定
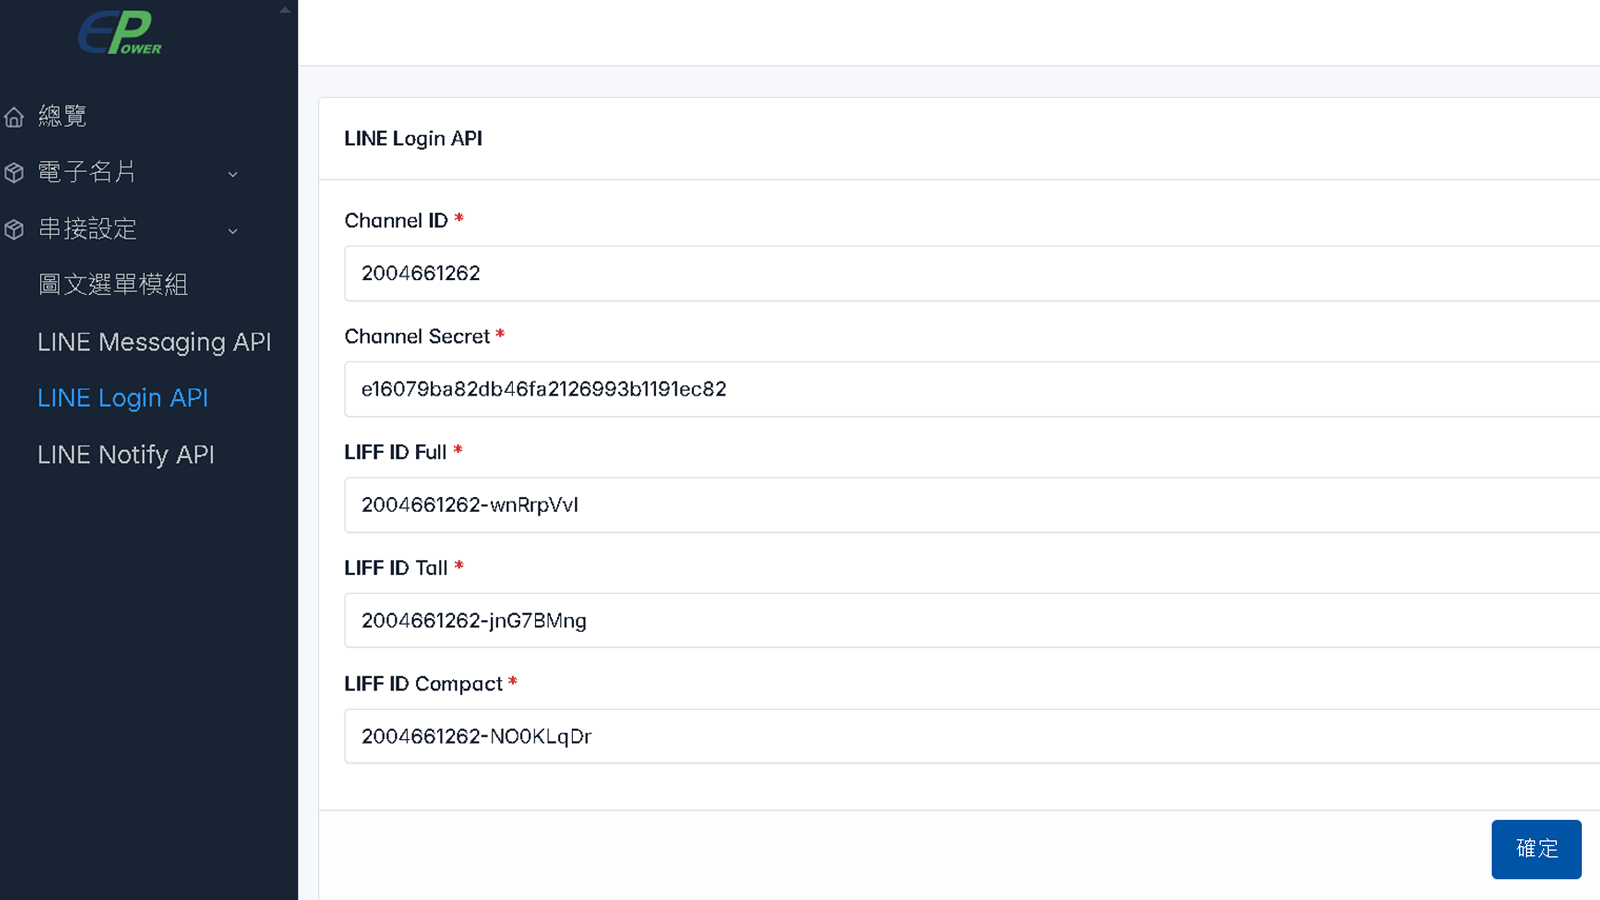
25.完成 LINE Login API 串接


